Lightweight backpack
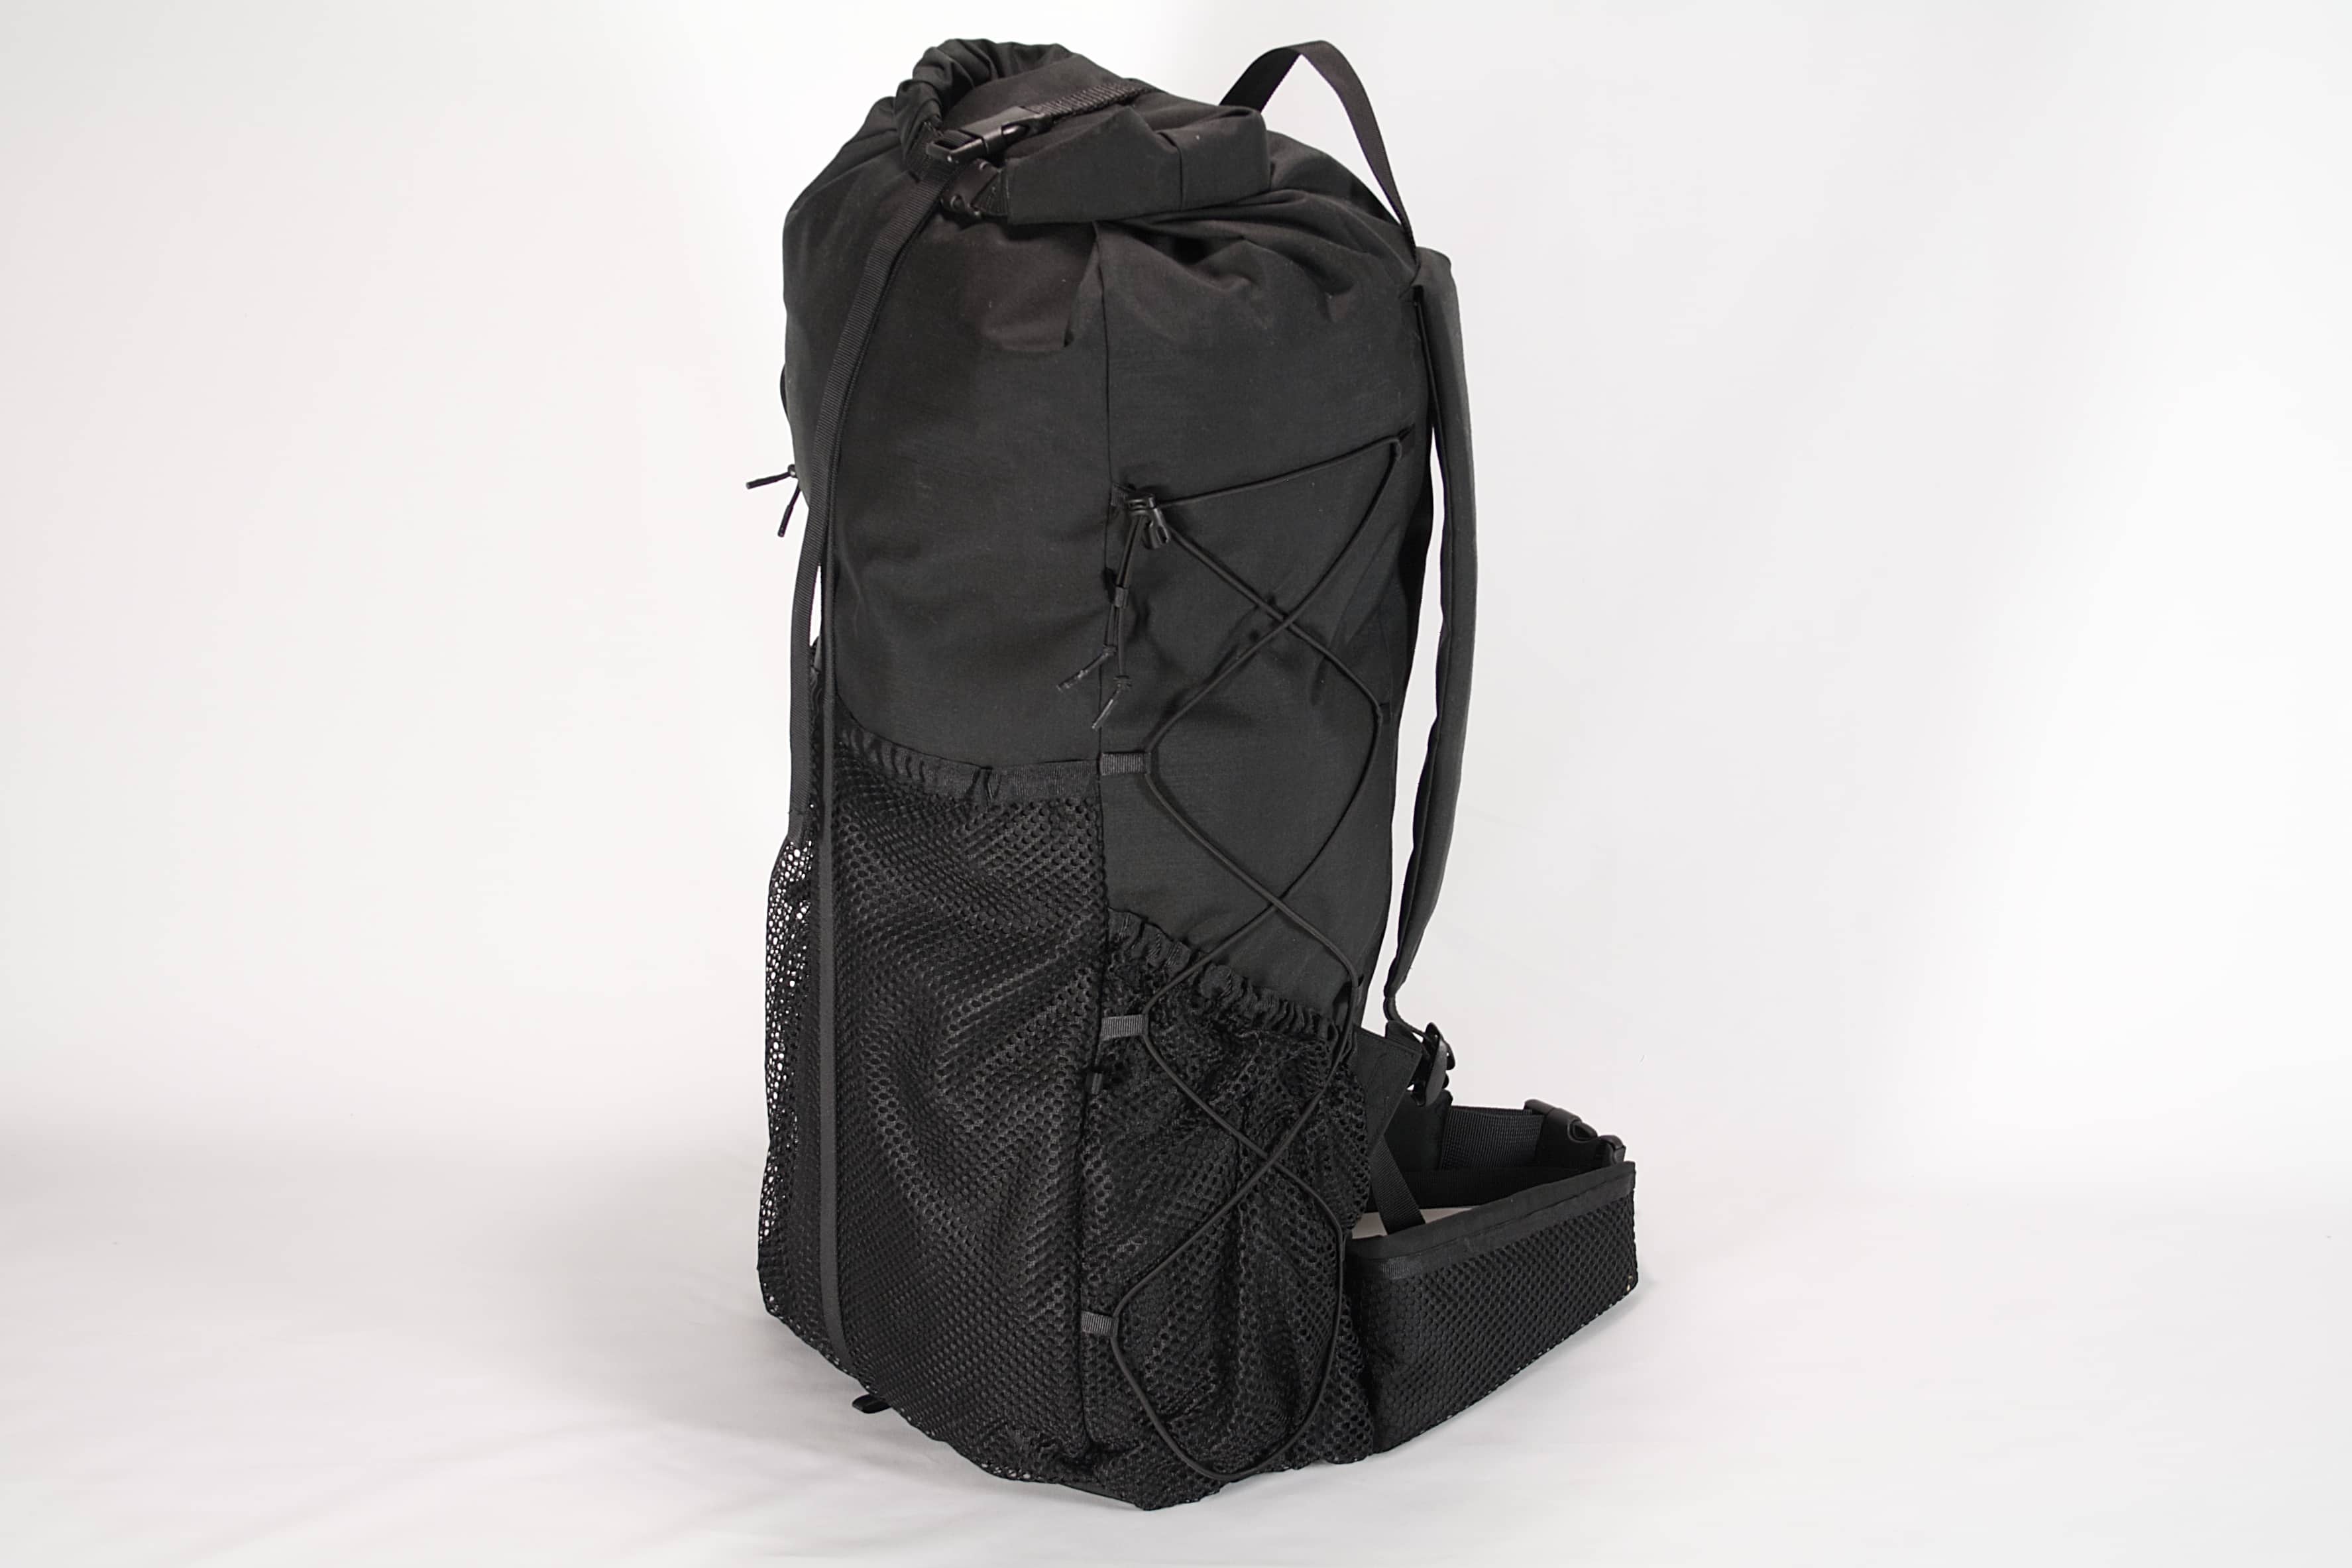
A lightweight backback for overnighters on the hills in the UK.
Jay Ham has written an excellent series on Backpackinglight.com on how to make your own ultralight backpacking gear. He shows you how to make a tarp, backpack and stuff sack, using 5m of lightweight fabric.
The series starts with the simple techniques needed to make the stuff sack, gradually introducing more complex constructions until you’re able to piece together the backpack, which is quite an ambitious project. I’ve now made all the items in the series. I started with virtually no knowledge of sewing, and never having used a sewing machine. Now I feel confident enough to work on my own designs and make more of my own gear. It’s been a hugely rewarding experience, and it’s changed the way I think about the gear I buy and use, so I wanted to share my notes to help others who may be considering making their own pack.
I’ve sewn 2 versions of Jay’s pack. The first, made from ‘crisp’ PU-coated ripstop nylon, closely follows his design. After testing this out, I decided to experiment with fabrics, design, sizing and construction to make a pack that was better suited to my needs. It’s this modified pack that I’m going to talk about here.
I’m not going to give complete instructions on how to make a backpack, because my design still closely follows Jay’s. If you want to read his instructions, get a BPL membership; it’s well worth the $20 membership fee just for this series. The purpose of these notes is to share some of the lessons I’ve learned, and give you some ideas for your own mods.
Since I made this pack, and first drafted these notes, another MYOG-er, Luke Schmidt, has written up his experience of pack design and fitting. He makes some excellent mods to Jay’s design, and has already explored some of the issues around seam strength and fit that are on my list for pack number 3.
Design considerations
One of the great things about making your own gear is that you can decide what features are important to you. These were the factors that influenced my design; your mileage may vary.
Weight. I’m not a gram counter and this is not a ‘Super-Ultralight’, or even ‘Ultralight’ pack. Whereas Jay’s pack sheds features in order to save weight, I’m happy to carry an extra few hundred grams to gain better weather protection, more space, or more features that are useful to me. This pack weighs 650g. That compares to 1400g for my ‘lightweight’ Go-Lite Pursuit, 2800g for my huge Karrimor pack and 170g for my original, smaller, PU-nylon version of Jay’s design. So it’s close to half a kilo heavier than the lightest pack I could feasibly make. That’s quite a serious trade-off.
Availability of materials. Cuben fibre and other super-lightweight fabrics are not readily available in the UK. We can get silnylon and PU-coated nylon pretty easily, but that’s about it. I made my first pack out of ripstop PU-nylon, which is cheap and lightweight, but it’s not terribly strong.
Size. I carry a little more in my pack than many US-based lightweight backpackers. Jay’s original design was too small for my needs. So I based my pack measurements on my existing weekend pack, a Go-Lite Pursuit.
Cost. While I would now prefer to carry a pack that I’ve made myself, as the cost approaches that of a commercial pack, some of the appeal does wear off. So I wasn’t keen to pay big bucks for highly specialised technical fabrics like Dyneema gridstop or cuben fibre.
Materials
Main fabric. I used 500gsm coated Cordura fabric for the main body of the pack. This is much heavier than cuben fibre, or even silnylon, but it’s tough, and has a thick waterproof laminate. It’s also relatively easy to find. It’s easy to work with — the coating stops it from fraying — and to mark out your pattern. Though it is quite thick, which makes it a little tricky in tight corners.
I bought 3m with the intention of making a few other things for more general use.
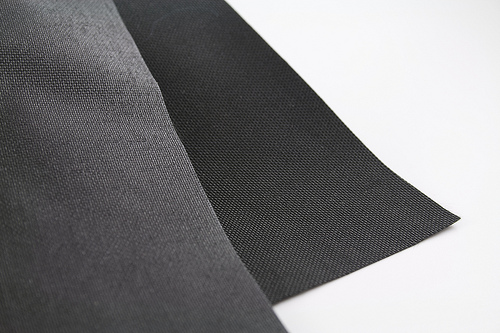
500gsm coated Cordura, coated face on the left, outer face underneath on the right
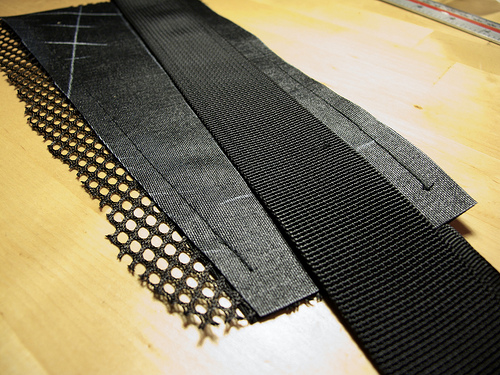
Webbing. For my first pack, I used 20mm polypropylene webbing. This time I switched to 20mm nylon webbing which has a finer texture. I also used 40mm webbing for the hip belt.
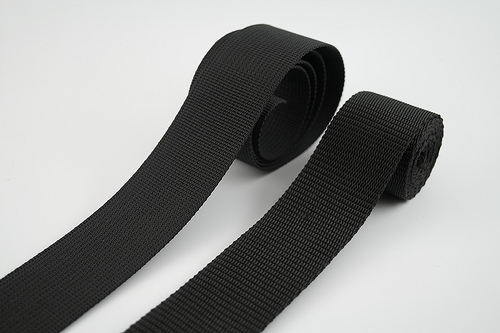
40mm webbing, nylon on the left, polyprop on the right
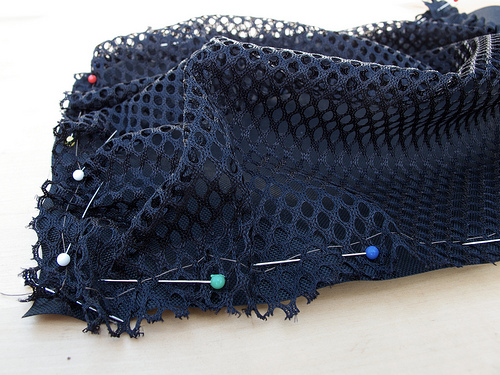
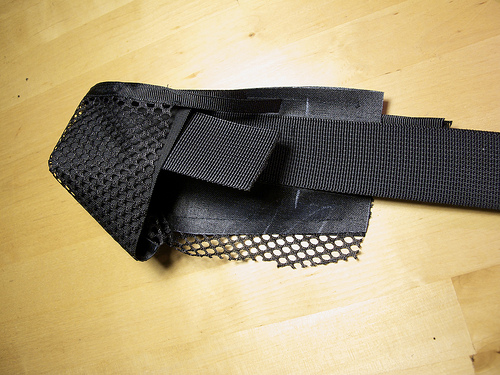
Mesh. This was the hardest material to source. I wanted mesh fabric for the side pockets that was tough, tear-resistant, and had plenty of stretch, but not so much that it would collapse under heavy loads. In the end I used Point North’s ‘Light Knit Mesh‘ which is pretty good, though not as stretchy as I would like. It’s worth noting that some mesh fabrics stretch in one direction but not the other, which you need to consider when cutting and orienting your mesh panels. </div>
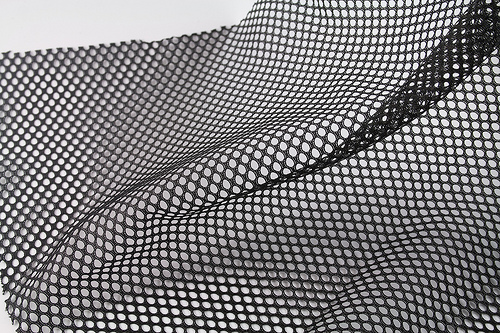
‘Light Knit Mesh’ from Point North
Nylon for internal pocket. This pack has a simple internal sleeve for a back pad. I used cheap non-stretch nylon.
Grosgrain (nylon ribbon). I used it for pocket trimming (15mm, to create channels to thread shock cord through), and also looped and sewed into the seams of the pack as part of the compression system (9mm). Cheap as chips, so buy loads.
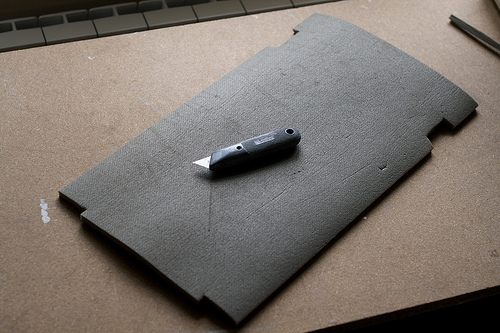
Closed Cell Foam. You need this for the padding on the hip belt, shoulder straps and back padding. I chopped up an old carry mat that we no longer use. Truth be told, I chopped up an old carry mat of my girlfriend’s and she wasn’t too happy about it.
Accessories. You will also need shock cord, ladderlocks, cordlocks and side release buckles. Th ere is a whole world of plastic fixtures out there to explore. If you like geeking out about this stuff, I can highly recommend you spend some time at the website of National Molding, who make a huge range of buckles, clips, rings, locks, etc.
Flexible sheet plastic. My design has a drybag-style top closure. It’s stiffened internally with strips of flexible plastic, about 1mm thick. It’s sold in craft shops as material for model-making. I got a huge sheet for £3.
Suppliers
I’ve used the two main UK technical fabric suppliers and would recommend them both:
The other one to consider if you’re UK-based is the German Extremtextil, who have an English language site, ship worldwide, and carry a wider range of fabrics than the two UK stores.
Features
Having made one pack following Ray’s design, and used it a few times, I had a few ideas for improvements.
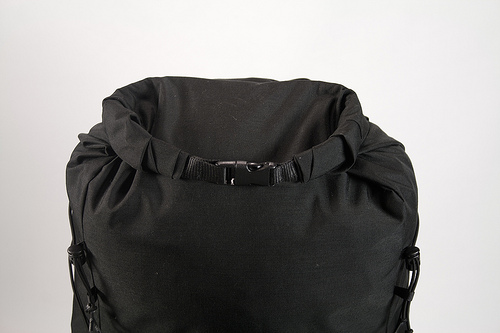
Drybag top. The original design had a simple draw cord cinch closure, which you can roll down and tuck under the compression strap. I found this very difficult to close in such a way that it would keep the rain out, so I decided to make a larger version of a drybag-style closure: A hemmed top stiffened with flexible plastic, with webbing sewn along one side, fastened with a side release buckle. I studied one of my Exped drybags and reverse-engineered their design on a larger scale.
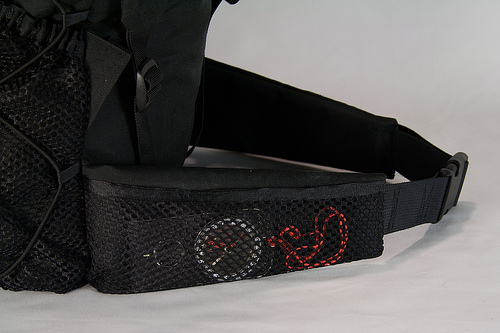
Hipbelt. Scrambling with a heavy pack is a little tricky. Having had a few hairy moments on Great Gable and Striding Edge, I knew I needed the extra security of a hipbelt. Not for weight distribution, but to keep the pack steady on my back. This is less of an issue if you’re only walking on level ground. I also added simple mesh pockets to the hipbelt, because they’re so useful. Nothing too big, but roomy enough to hold a compass or a chocolate bar.
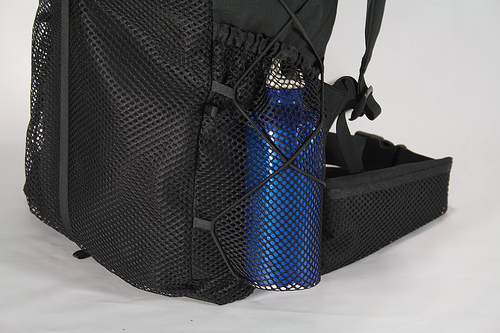
Mesh side pockets. I wanted big side packets to store stuff in. A large external mesh pocket on the front is also useful for carrying a wet tent or clothes.
Better compression. Jay’s design has an ingeniously economical compression system. But I wanted something a little more robust, and also one that could double up as an attachment system for wet gear. Using this system, I can strap my whole Laser Competition tent down one side of the pack. I also added loads of extra grosgrain loops for more compression cord or as attachment points, since there is so little weight, strength or cost penalty.
Internal sleeve for pack padding. My design uses a piece of closed cell foam as back padding and for better weight distribution. It’s an experiment, but I figured it would be easy to do, and the foam is removable, so I can always dispense with it if it doesn’t work out. I could also use the small piece of foam as part of sleeping pad system if I end up getting a smaller 3/4-length sleeping pad in the future.
It’s black. In the Hitch Hikers Guide to the Galaxy, Zaphod Beeblebrox and Ford Prefect steal a spaceship from Milliways, the Restaurant at the End of the Universe. Zaphod comments on the control panel:
It’s the weird colour scheme that freaks me. Every time you try to operate one of these weird black controls, which are labeled in black on a black background, a small black light lights up black to let you know you’ve done it. Hey, what is this, some kind of galactic hyper-hearse?
’nuff said.
Construction
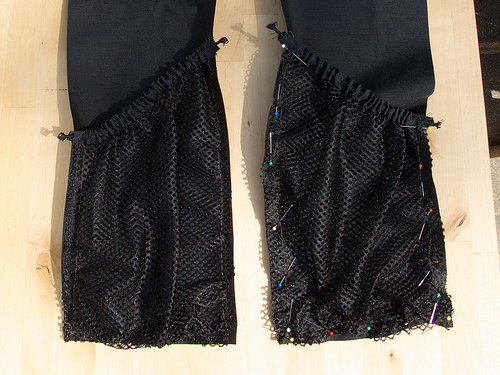
Side pockets. These are cut from a piece of fabric that is bigger than the final pocket size. They’re then pleated along the bottom and sides to make baggy pockets. The opening is held tight against the pack with a shock cord top, and the whole pocket can be squashed flat underneath the side compression system, a zig zag of shock cord attached to each side of he pack with grosgrain loops.
- Cut the pocket fabric: a piece of mesh fabric 10cm wider and 5cm taller than the size you want your pockets to be. I gave mine a slanted top as well to make them easier to access while wearing the pack.
- Make the shockcord-elasticated top. Cut two pieces of 15mm grosgrain and sew them on to the top of the pocket fabric, sandwiching the fabric between the two. Or use one piece of 30mm grosgrain and fold it over, again with the fabric sandwiched between. Thread a piece of shockcord through the channel you’ve just made.
- With a needle and thread, sew a running stitch around the other 3 sides of the pocket. As you finish each side, pull the thread to bunch up the pocket fabric (like drawing a curtain). When you have bunched up the fabric to the correct size, secure your running stitch at the corner with a knot or a loop.
- You can then baste each pocket onto the main pack side panels. The exposed edges will be sewn into the main seams of the pack. When sewing up the tops of each side (the shockcord channel) pull the shockcord tight, so it sits flush against the main pack side panel. The shockcord channel should be bunched up when the pocket is flat against the pack so it has room to expand when you use the pocket.
It’s worth considering how much extra fabric you want to give the pockets. I added 10cm width to each of the side pockets, but only 5cm to the back pocket. I thought that I would need less room in this pocket. In practice, I could have done with more — the back pocket isn’t roomy enough, and the space that 5cm of extra fabric gives is quickly swallowed up when the main pack is full.
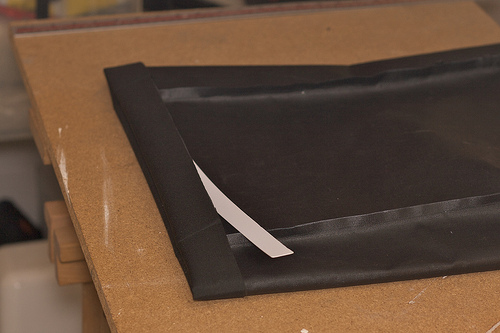
- Start by trimming the top edge so it’s even all the way round.
- Cut a piece of 20mm webbing with a length of half the circumference of the pack + an 10cm (to allow for the side release buckles)
- Cut two strips of flexible plastic; one the width of the webbing (20mm), one a bit narrower (say, 15mm). The first should be about 1cm less than half the circumference of the pack, the second about 2 cm less.
- Roll each piece into the top edge of the pack with 2 folds and pin, before sewing along the bottom fold to form a seam with the plastic sealed inside.
- Thread the webbing through each half of the buckle – one half at each end. Fold the webbing over at each end and stitch across its width close to each buckle.
- Place the webbing on the pack on the side with the shorter, thinner plastic. It should protrude about an inch from either side. Stitch the webbing onto the pack by sewing all the way round, close to the edge of the webbing, and through the pack fabric, but missing the plastic. (That’s why this piece of plastic is slightly smaller.)
Main compression strap. My pack has a compression strap that is sewn into the front bottom hem, is attached to the front mesh packet, clips above that, and continues over the roll top closure into the seam along the top back where the shoulder straps are attached. So far, I’m pretty pleased with how well this works. But it’s tricky to make, because you have to get the sewing order right.
- When making the front pocket, sew on the grosgrain channel to the front of the mesh fabric. I used two pieces of 15mm grosgrain, but this would be a lot easier with one piece of 30mm folded over.
- Cut a piece of webbing for the compression strap. It should be long enough to allow for plenty of height adjustment. I’d say mine is about 80cm long.
- Sew the webbing up the front of the pocket, stopping when you get about 2/5 of the way up the grosgrain.
- Flip the assembly over so the webbing is on the table, followed by the grosgrain, then the mesh fabric
- Place the shockcord along the grosgrain, and fold it over to form a channel with the shockcord inside (or in my case, place on top another piece of grosgrain. This is when it becomes obvious why you have to stop sewing less than halfway up the grosgrain – you don’t want the webbing strap to fold over when you make the channel.
- Sew up the grosgrain channel to seal in the shockcord. Once, along the bottom, if you’re using one wide piece folded over. Or twice, along the top and bottom, if you’re using two pieces of half the width. This is when it becomes obvious why you have to sew the webbing strap on first. If you were to do it now, you’d end up stitching through the shockcord, preventing its free movement.
- When you’ve finished the main pack construction, you can attach the side release buckle to this strap. Fit the adjustable half of the buckle to the front strap, and the fixed half to the rear strap that comes over the top of the pack. The strap will be loose in this half of the buckle, but eventually you will sew it in to a fixed position.
- Fill the pack to it’s smallest likely level, tighten the adjustable buckle, clip it to the other half of the buckle and pull the rear strap through until the pack is compressed.
- Pin the rear strap to fix its position in the buckle.
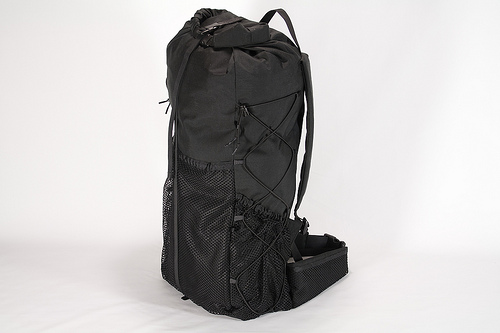
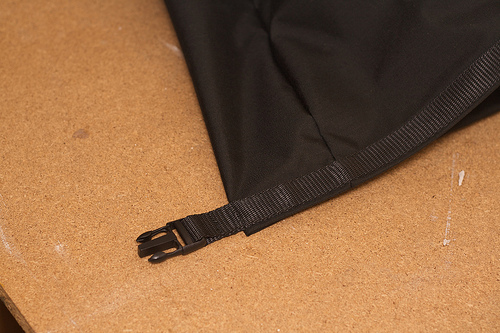
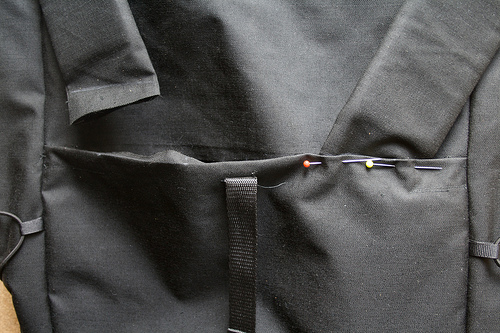
- Then fill the pack up some more, to it’s highest likely level, close it, loosen the adjustable strap at the front, clip the buckle closed to verify that your strap is long enough. The picture shows my pack at this stage.
- When you’re happy that your strap is adjustable within the limits you’ll need, you can sew the non-adjustable half of the buckle onto the rear strap and trim the excess webbing.

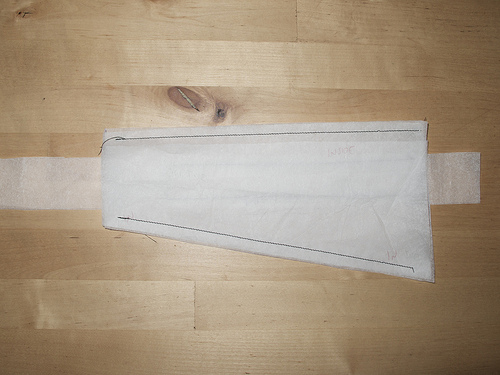
Padded hipbelt. This has a complex construction, with two layers of fabric, an internal webbing strap, foam padding and a mesh pocket. The two halves had to be made inside out, then the short ends sealed (with the webbing strap protruding, not trapped inside the pocket), then the padding fitted inside, then sealed at the long end.
I made a tissue paper prototype first to figure out the right way to layer the fabrics. It saved me a lot of wasted time and fabric.
Shoulder straps. I copied the simple shoulder straps from Jay’s original design. But when I took the pack out for it’s first test run, I found the straps were too close together, and dug into my neck and trapezius muscles. To be fair, I was carrying a very heavy load by ‘lightweight’ standards (probably something like 15kg, which is really too much for a frameless pack). But the discomfort was noticeable after a few minutes, so even with a lighter load, I’d be feeling the pinch — literally — on a 2-day trip. On a heavier framed pack, this would be less of a problem, but my frameless pack deformed significantly under the load, in a way that I had not expected. After all my work, this was something of a low point.
So I unpicked the seams along the back of the pack, and a few centimetres down each side, and unpicked the shoulder straps. I repositioned them further apart ], pinned them in place and tested the pack out again. When I was satisfied with the positioning, I sewed it all back up. This whole process was surprisingly easy, once I’d recovered from the initial trauma of having made such a serious mistake.
So far, this new arrangement seems comfortable enough, but in future, I’ll probably look at making curved shoulder straps to lessen this problem. It’s clear that careful consideration needs to be given to the physical behaviour of the pack under typical loads, as it can deform significantly.
The next version
Of course, I’m looking forward to making the next version. So what would I do differently? Having filled this pack with my normal gear, which comes in at about 12-13kg, including food and water, I think I’m pushing the limits of a frameless pack structure. At this sort of weight, my semi-rigid Go-Lite Pursuit pack is just about perfect. So a critical examination of my pack list would be a good place to start.
Since making this version, I’ve done a couple of other sewing projects, including making zipped pockets and lined bags. So I’m more confident about complex constructions and layering. But at the same time, I can see the benefits of simplicity. While the extra features of this pack make it more useful than my first attempt, there is a considerable weight penalty, and it was much more time-consuming to make.
I would like to play with some other fabrics. The PU-coated ripstop nylon I used in version 1 is super cheap and lightweight. But it’s not very strong. This 500gsm coated Cordura is much tougher, but probably a little overkill. I suspect that the seams would give way long before the fabric was tested to its limits. I’d love to try out some X-Pac or Gridstop, or maybe just some lighter weight Cordura. 3D mesh is also commonly used in commercial packs for back and shoulder strap padding. It would be interesting to see how easy this is to work with, though its rather pricey to be used for experimentation.
On features, the dry-bag closure is good, and would work even better with a lighter-weight fabric. The hipbelt is also good, though I suspect that I could make a simpler version. Better (curved) shoulder straps would be a good change, and a sternum strap would probably be a wise addition.
Stitching and seams. A pack is only as strong as its weakest part. On this pack, made from tough Cordura fabric, the weakest parts are the seams, particularly where the shoulder straps attach to the main pack. Luke’s article has some great ideas on how to construct these joins with more resilience. I’ll definitely be putting his ideas into practice on my next pack.
I’ve also been using simple plain seams on my packs so far, with some additional top stitching in places for extra strength. But I’ll be looking at using stronger felled seams in future packs.
Compression and fit. At the time of writing, Backpackinglight.com is in the process of publishing Will Rietveld’s monumental ‘Lightweight Frameless Backpacks State of the Market Report‘. A comprehensive review of the leading commercial packs, all with with different target users, design approaches, and trade-offs. It’s a useful resource for anyone designing their own gear, as he gives valuable insight into the impact of all these design decisions – the same decisions we’re making.
He devotes considerable space to pack compression systems and deformation, a key consideration for a frameless pack. Having already experienced one severe design flaw exacerbated by pack deformation, I’m determined to get this right next time. On this pack, my compression system also doubles as external storage for clothes, tent, etc. While a versatile system, it only offers ‘soft’ compression, stretching under load, and not really maintaining the unloaded pack shape and geometry. The back is effectively shortened, the load can be unstable inside the pack and the hip belt and shoulder straps behave differently.
The behaviour of the back panel of the pack, it’s effective length, and the effect of loads on the shoulder straps and hipbelt are critical factors in the comfort of the pack. These are all considerations I’ll be building into the design of pack number 3.