Designing a new board — again
My previous 2-board design worked OK, but I struggled to find a way to enclose it in a reasonably-sized case.
I made two changes that enabled me to move on to a more compact design:
-
I ditched the Uno form-factor, and swapped it for an Arduino Nano. These are cheap enough that they can be embedded permanently in the project, can draw power from the same 12 V supply that the motor needs, and are a quarter of the size of an Uno.
-
I realised the mix of SMD and through-hole components could work in my favour. All the controls (except the OLED screen) are surface-mount, and should be soldered directly onto the front copper face of the board. But the Arduino Nano, the driver shield and the connections to the motor and end-stops are all just headers, which are more readily available in through hole versions, and are much easier to solder from behind.
So I was able to make effectively a two-sided board, while still only needing to mill the copper on one side.
The front (copper side) of the board, with all traces and user-facing components:
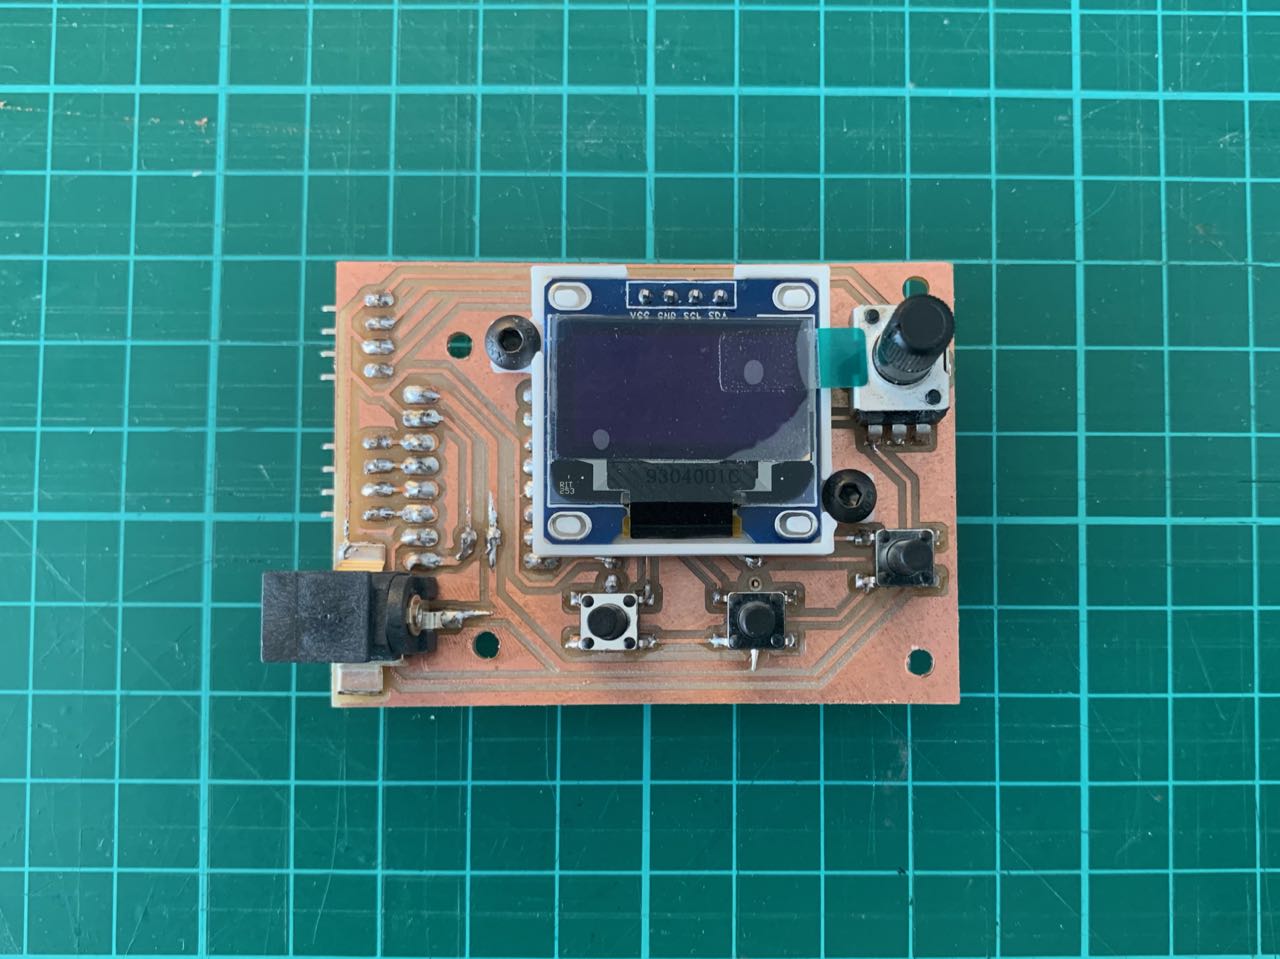
You can see here I also made a simple mount for the OLED screen, to hold it square on the board.
The back side of the board, which just has female headers for the Nano and driver module, and male headers for connections to the motor and end stops:
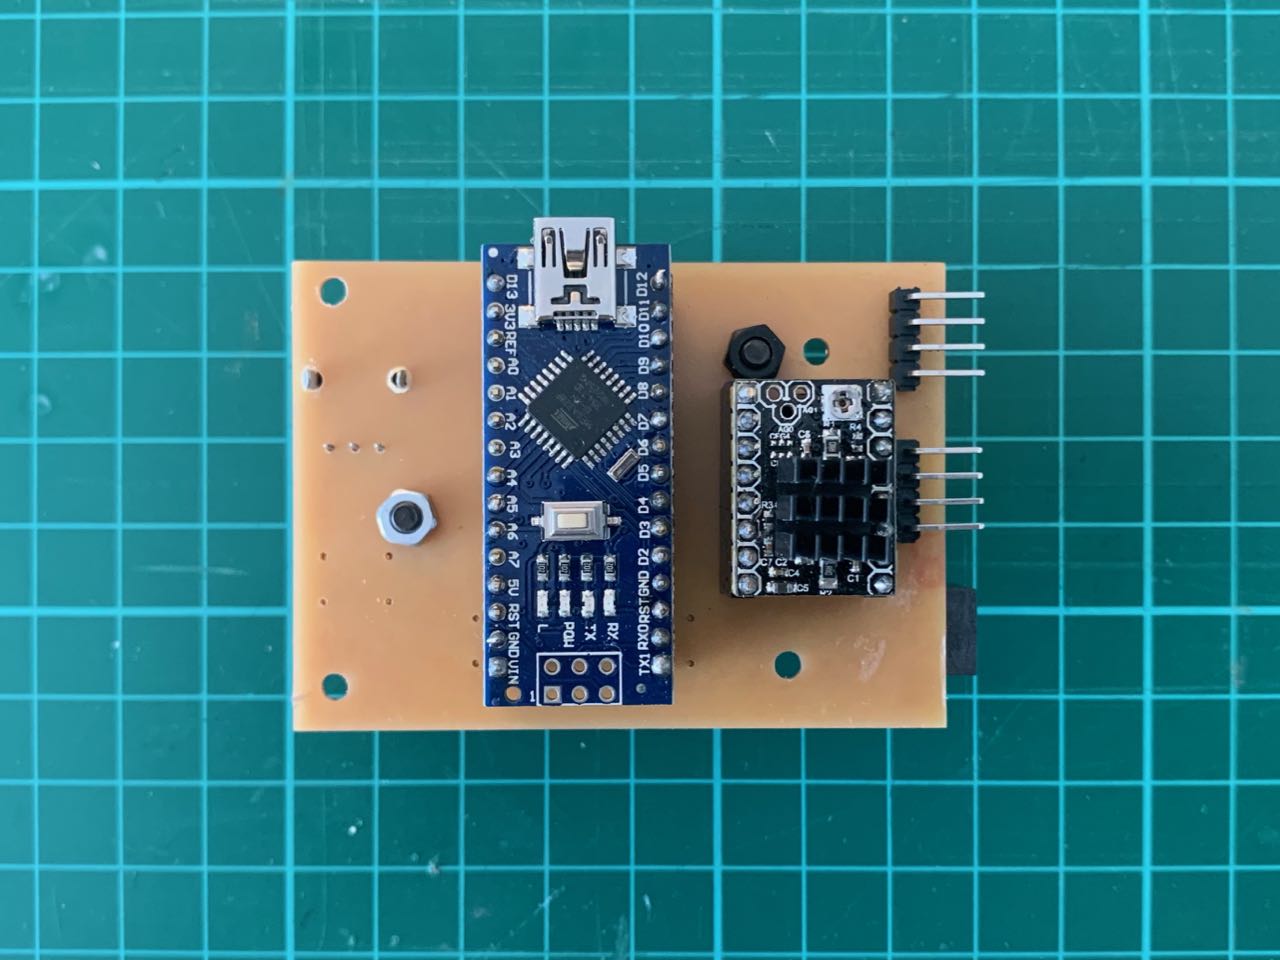
(Not visible here is the smoothing capacitor underneath the driver module.)
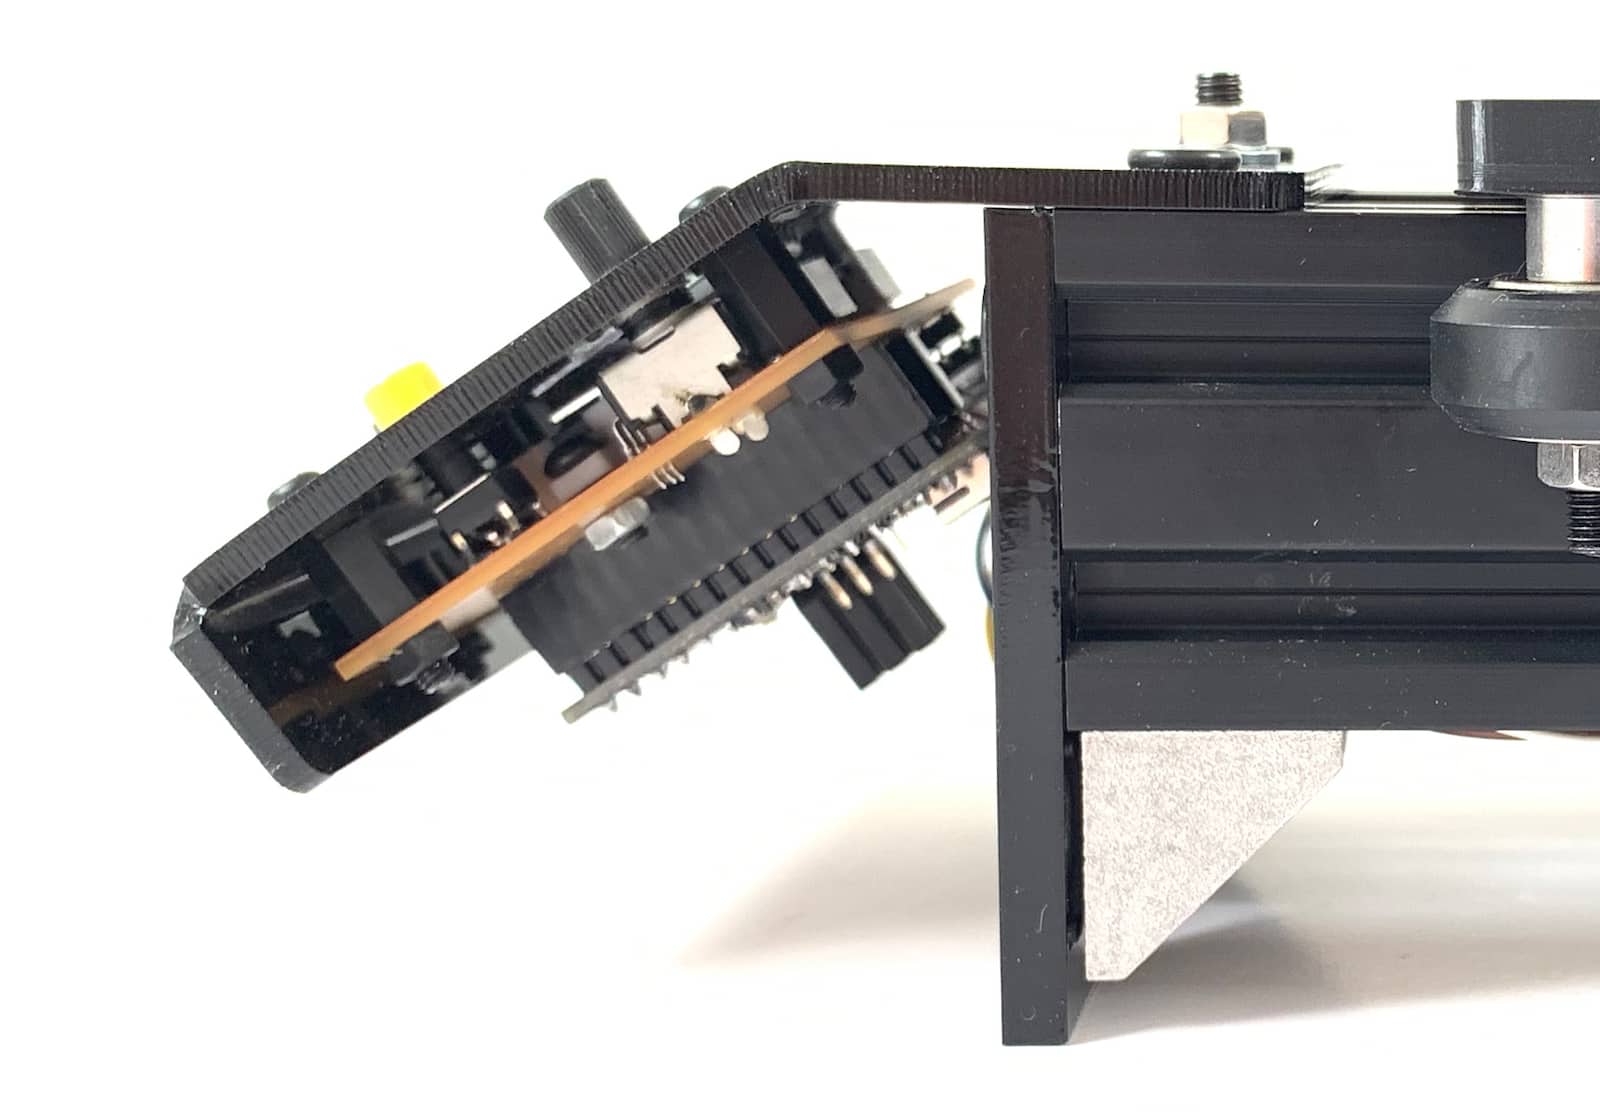
This board is still quite bulky, largely because of the driver heatsink, but I was able to make the footprint small enough that it could be mounted on the end of the slider frame, which is 80 mm wide.
There are a couple of improvements I’d like to make:
- Flip the Nano around so its USB port is accessible without removing the board from the faceplate.
- Use the through-hole DC jack mounted to the underside of the board so no cutout is needed on the faceplate.
- Use straight instead of right-angle headers for the external connections to the motor and end-stops. I chose these because I was going to put this board inside a case, but mounted this way, it would make more sense if they just went straight down from the board.
These board designs are all the the Git repo: fab-slider/boards/driver-arduino-shield/v3
As is an STL for the OLED display mount: fab-slider/3d-parts/v1/electronics-face-plate