A fab-able motorised camera slider
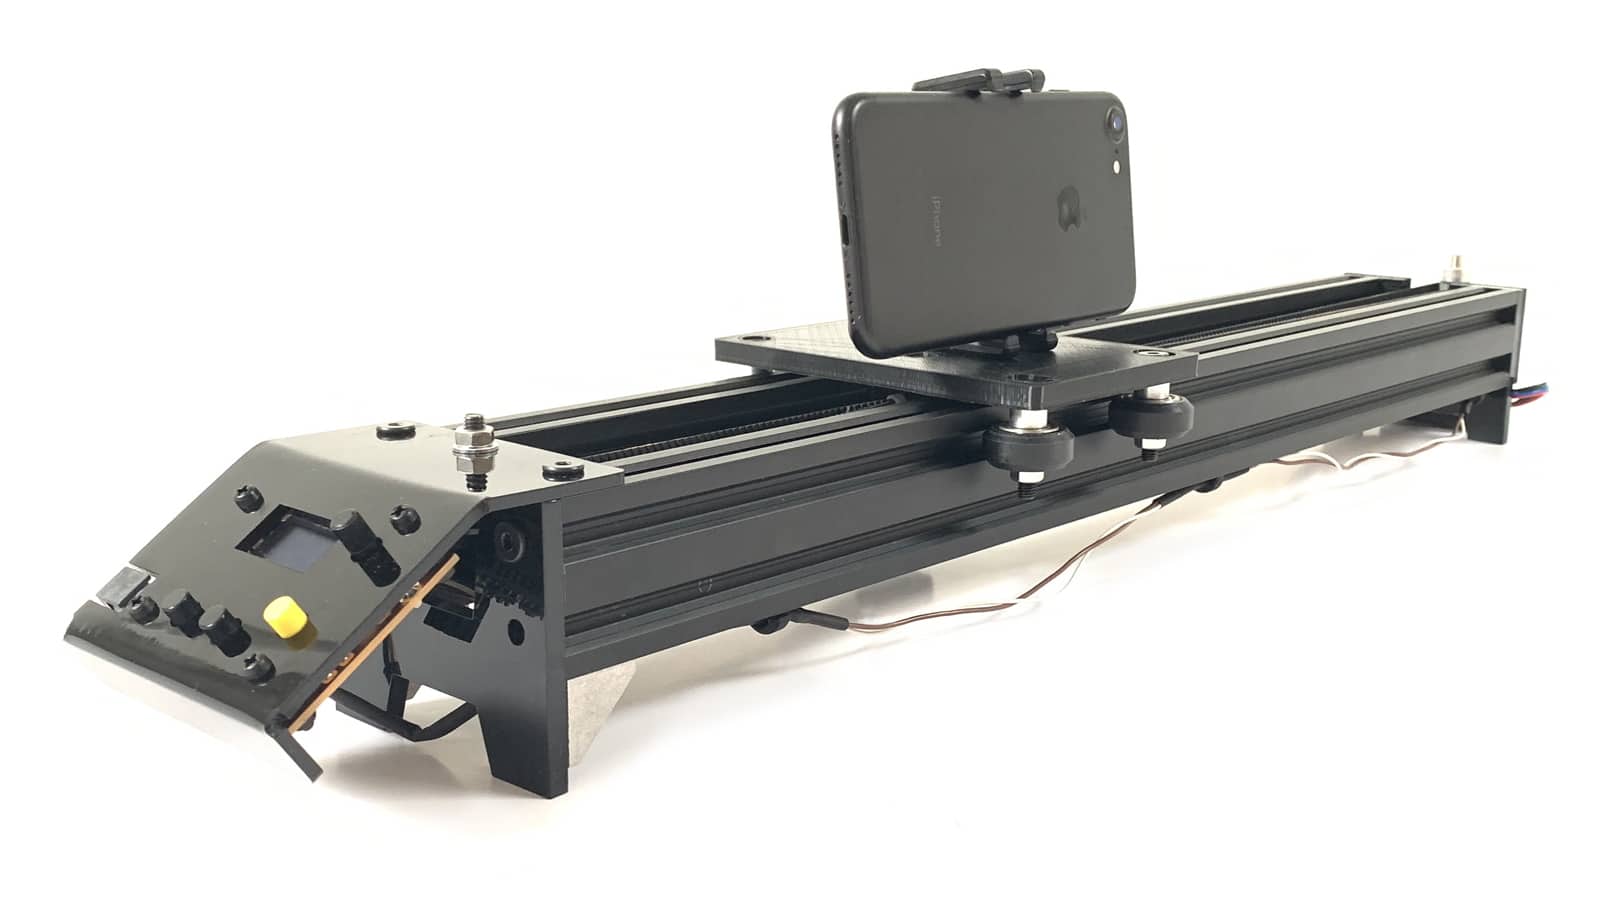
Fab slider is a simple machine for shooting moving time-lapse videos or panning shots, that anyone can make using tools and materials in most fablabs or makerspaces. All the design files and source code are available here.
It's also a tool for learning: about motors and motion control; 3D design and printing; Arduino programming; the design process, iteration and problem-solving. All my notes from the initial idea through several versions to the current machine are published as part of the project.
Samples
Learning Journal
Mostly, this project is about learning. The machine is an excuse, not the end goal. So I've kept pretty exhaustive documentation of all the stages I've been through, mistakes, and all the confusing stuff I've had to figure out.
My goal is to be more systematic in my design process, and to share some of the viewpoint of a beginner, as guides written by experts often assume understanding that beginners don't have.
v.1 Getting started | |
v.1 Design |
|
|
All the 3D parts: Board design and docs for my A4988 stepper driver Arduino shield: boards/driver-arduino-shield/v1/ |
|
v.1 Building the machine | |
v.1 Software and machine control | |
|
The Arduino code for this version is at:
Also some code for an older, more complex state machine: |
|
v.1 Review | |
v.2 Design and build | |
|
Eagle board designs for the v.2 and v.3 shields:
/boards/driver-arduino-shield/v2 Electronics housing: /3d-parts/v1/electronics-face-plate Arduino code: /arduino-code/v2 |
|
v.2 Result | |
|
|
|