Kessel Run Board Game
Here’s a project still in prototyping stages, but it’s a simple one, and you can probably do a better job.
It’s a mashup of Ticket to Ride and Star Wars: specifically the game-play of Ticket to Ride, but set in the Star Wars Universe. In Ticket to Ride, you play a rail baron building out your transport empire across the US or Europe, using your rolling stock to claim routes. In Kessel Run, you play a scruffy-looking smuggler claiming trade routes across the universe, using a ragtag assortment of freighters and attack ships stolen or won in gambling deals, to protect your routes from other mercenaries and villainous scum.
(While Kessel Run is way cooler than Ticket to Ride, bear in mind that lawyers are not cool, and they will come down on you like Vader if you attempt to sell something like this, using intellectual property from two lucrative entertainment franchises.)
This version is a prototype I made to test a few basic principles; at some point I’d like to make a better version that addresses its shortcomings.
Materials
You’ll need:
- A board of some sort – I used 6mm MDF
- Paint and varnish (I used acrylic)
- A labelling machine, or some other way of marking the place names on the map
- Something to make the ships out of – I used strips of wood cut down with a circular saw Beading would work better, but is expensive.
- Card, to make the playing cards
- You’ll also need access to the internet to download the rules, if you don’t know them already, and to download an image of the map you want to copy.
- I used image assets from the Ticket To Ride iPad app to extract route information. You could probably find this on the internet too.
- A printer, to print out an enlarged version of that map to use as a template.
Making your map
Ticket to Ride comes in many varieties. I wanted to use a map that didn’t have a recognisable shape, so avoided the classic USA map, and instead went with the Swiss version. In some respects this may not be the best choice, as the map works slightly differently. I’d advise you choose a simple map like the USA version unless you like the extended gameplay options on the newer varieties.
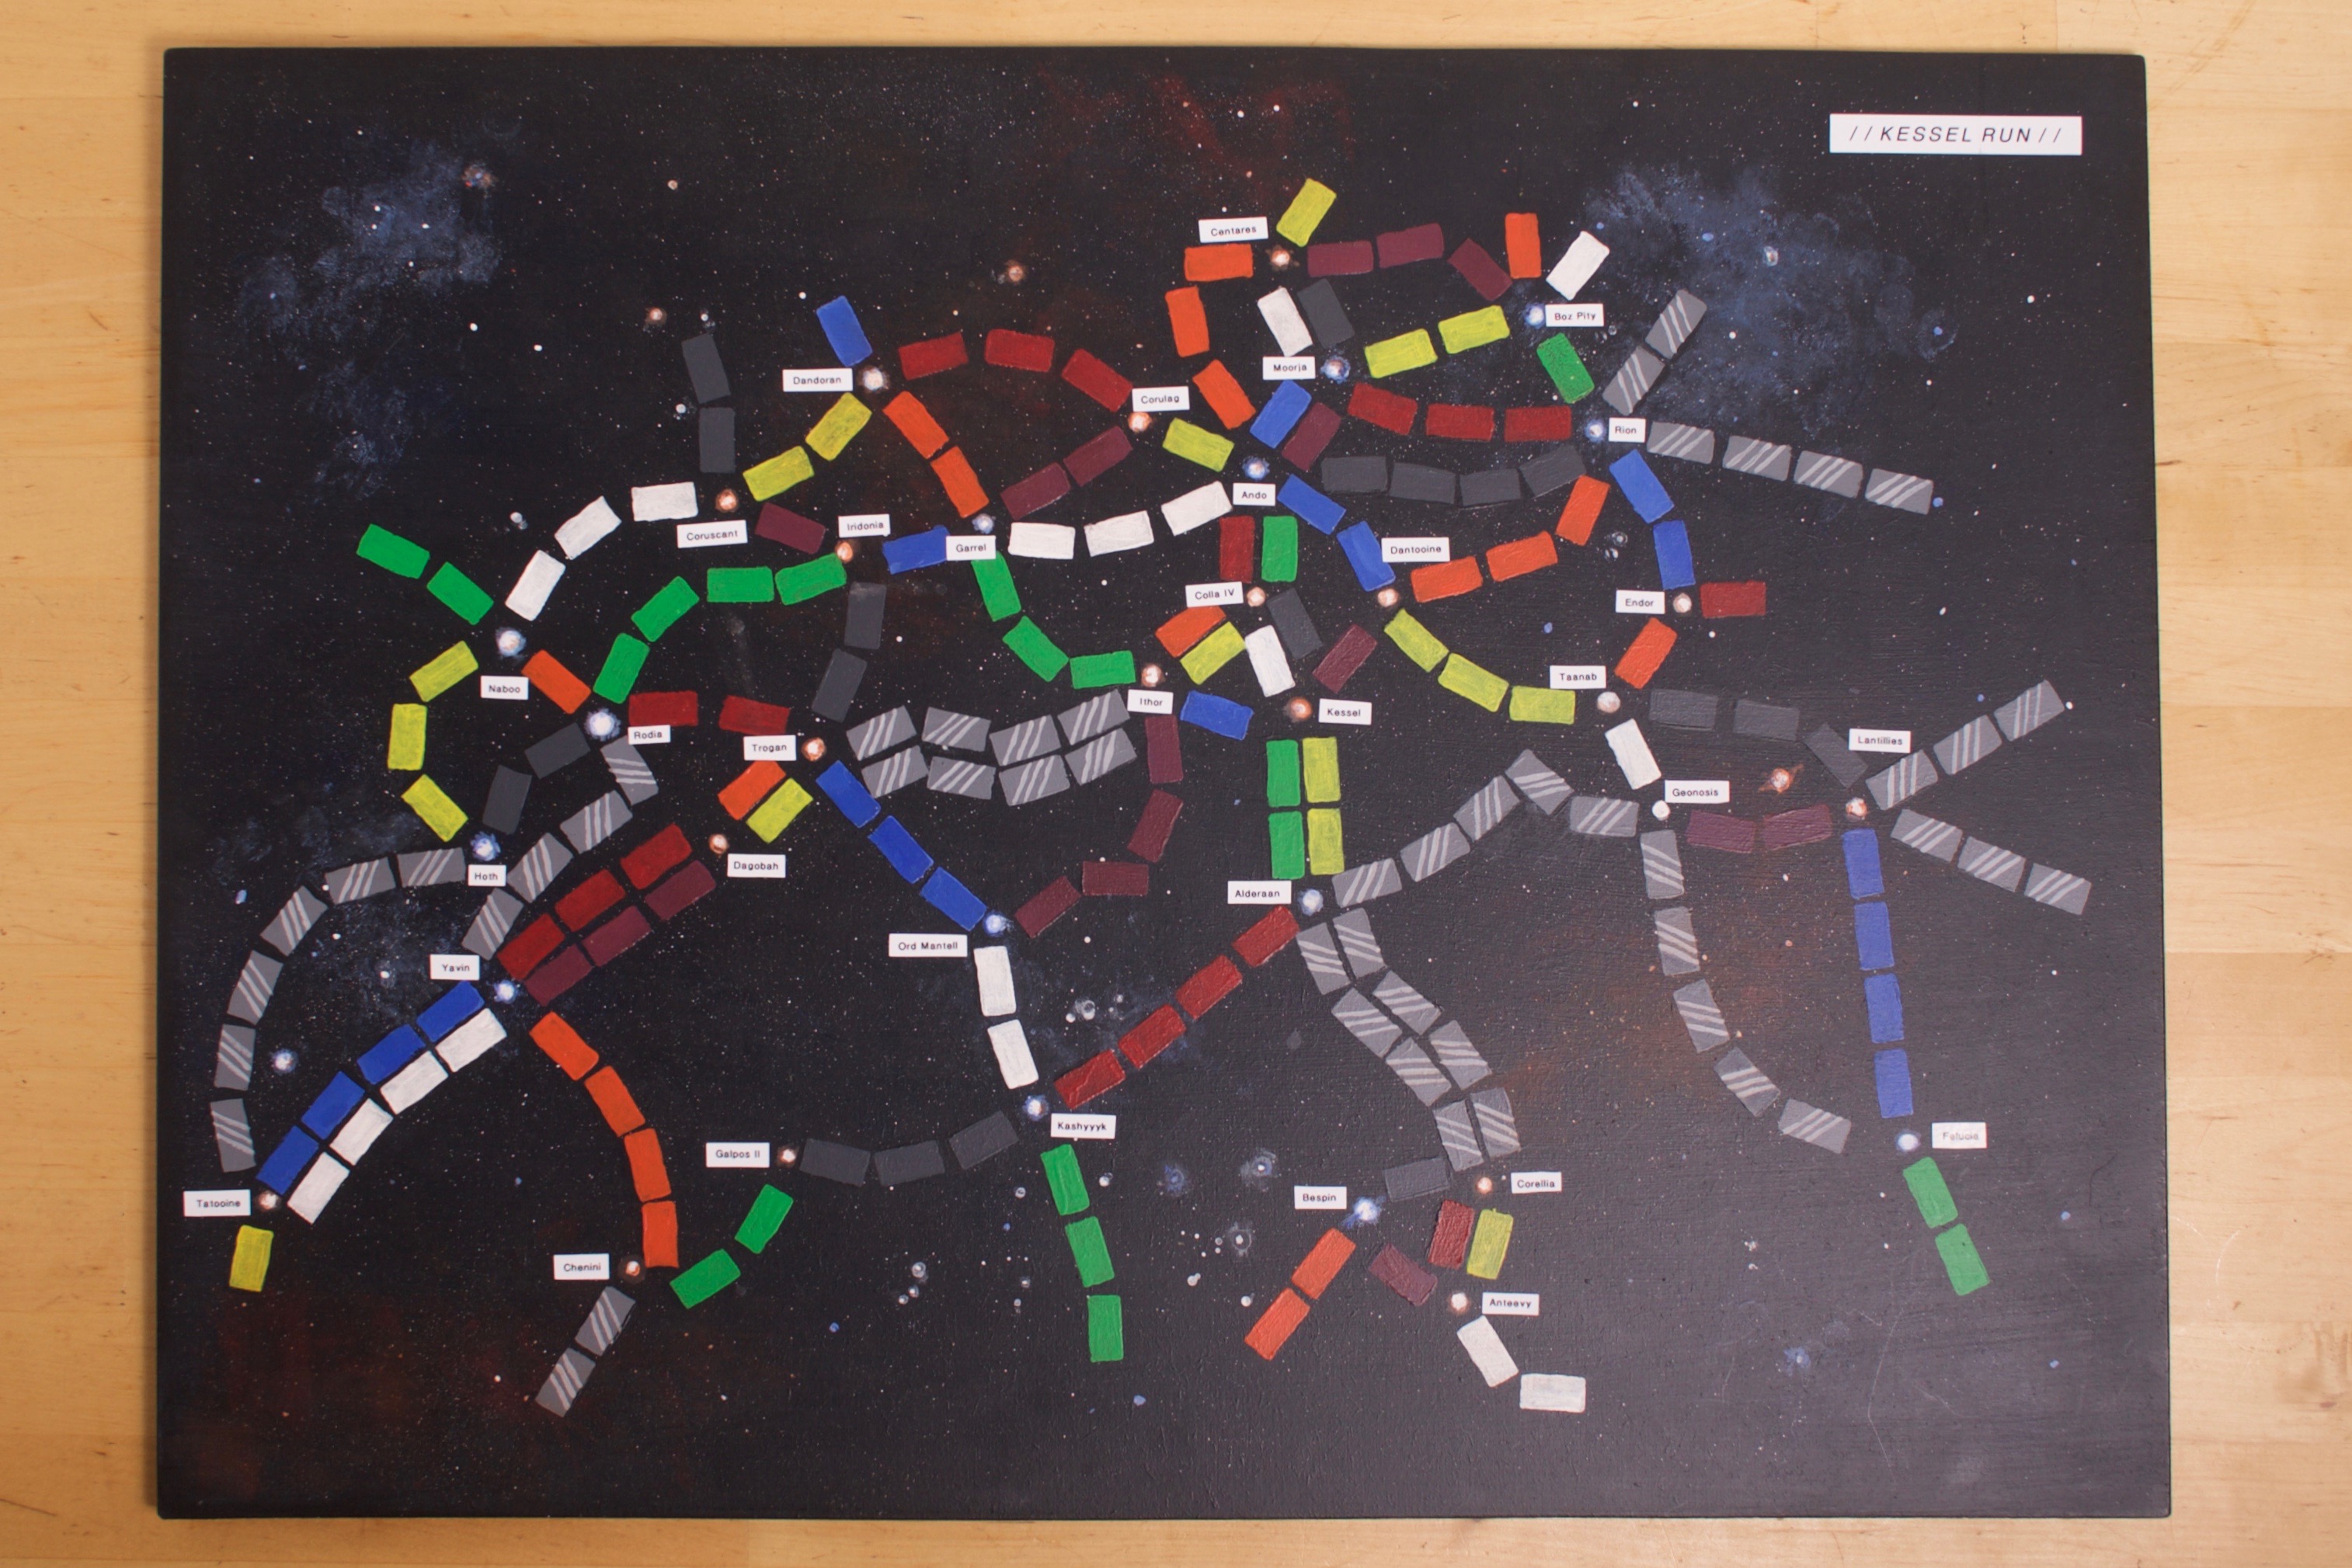
A web search for your chosen map will yield plenty of high-resolution images. Download the map you want to use, and open it in an image editor. Enlarge it to the size of your board, then print it out onto several sheets of paper. Tap these together so you have a complete map at the right size.
Tape this map over your board, and use a pin to make a mark where each city is.
Create the universe
Now you’re ready to paint the board. This is the fun bit – and I say this as someone who has no painting skills. Give the whole thing a coat of black. Then mix up some orange, purple or yen and using a sponge dab over some areas to create the subtle effect of distant galaxies. A web search for universe or galaxy will turn up some image inspiration.
Painting stars on the map
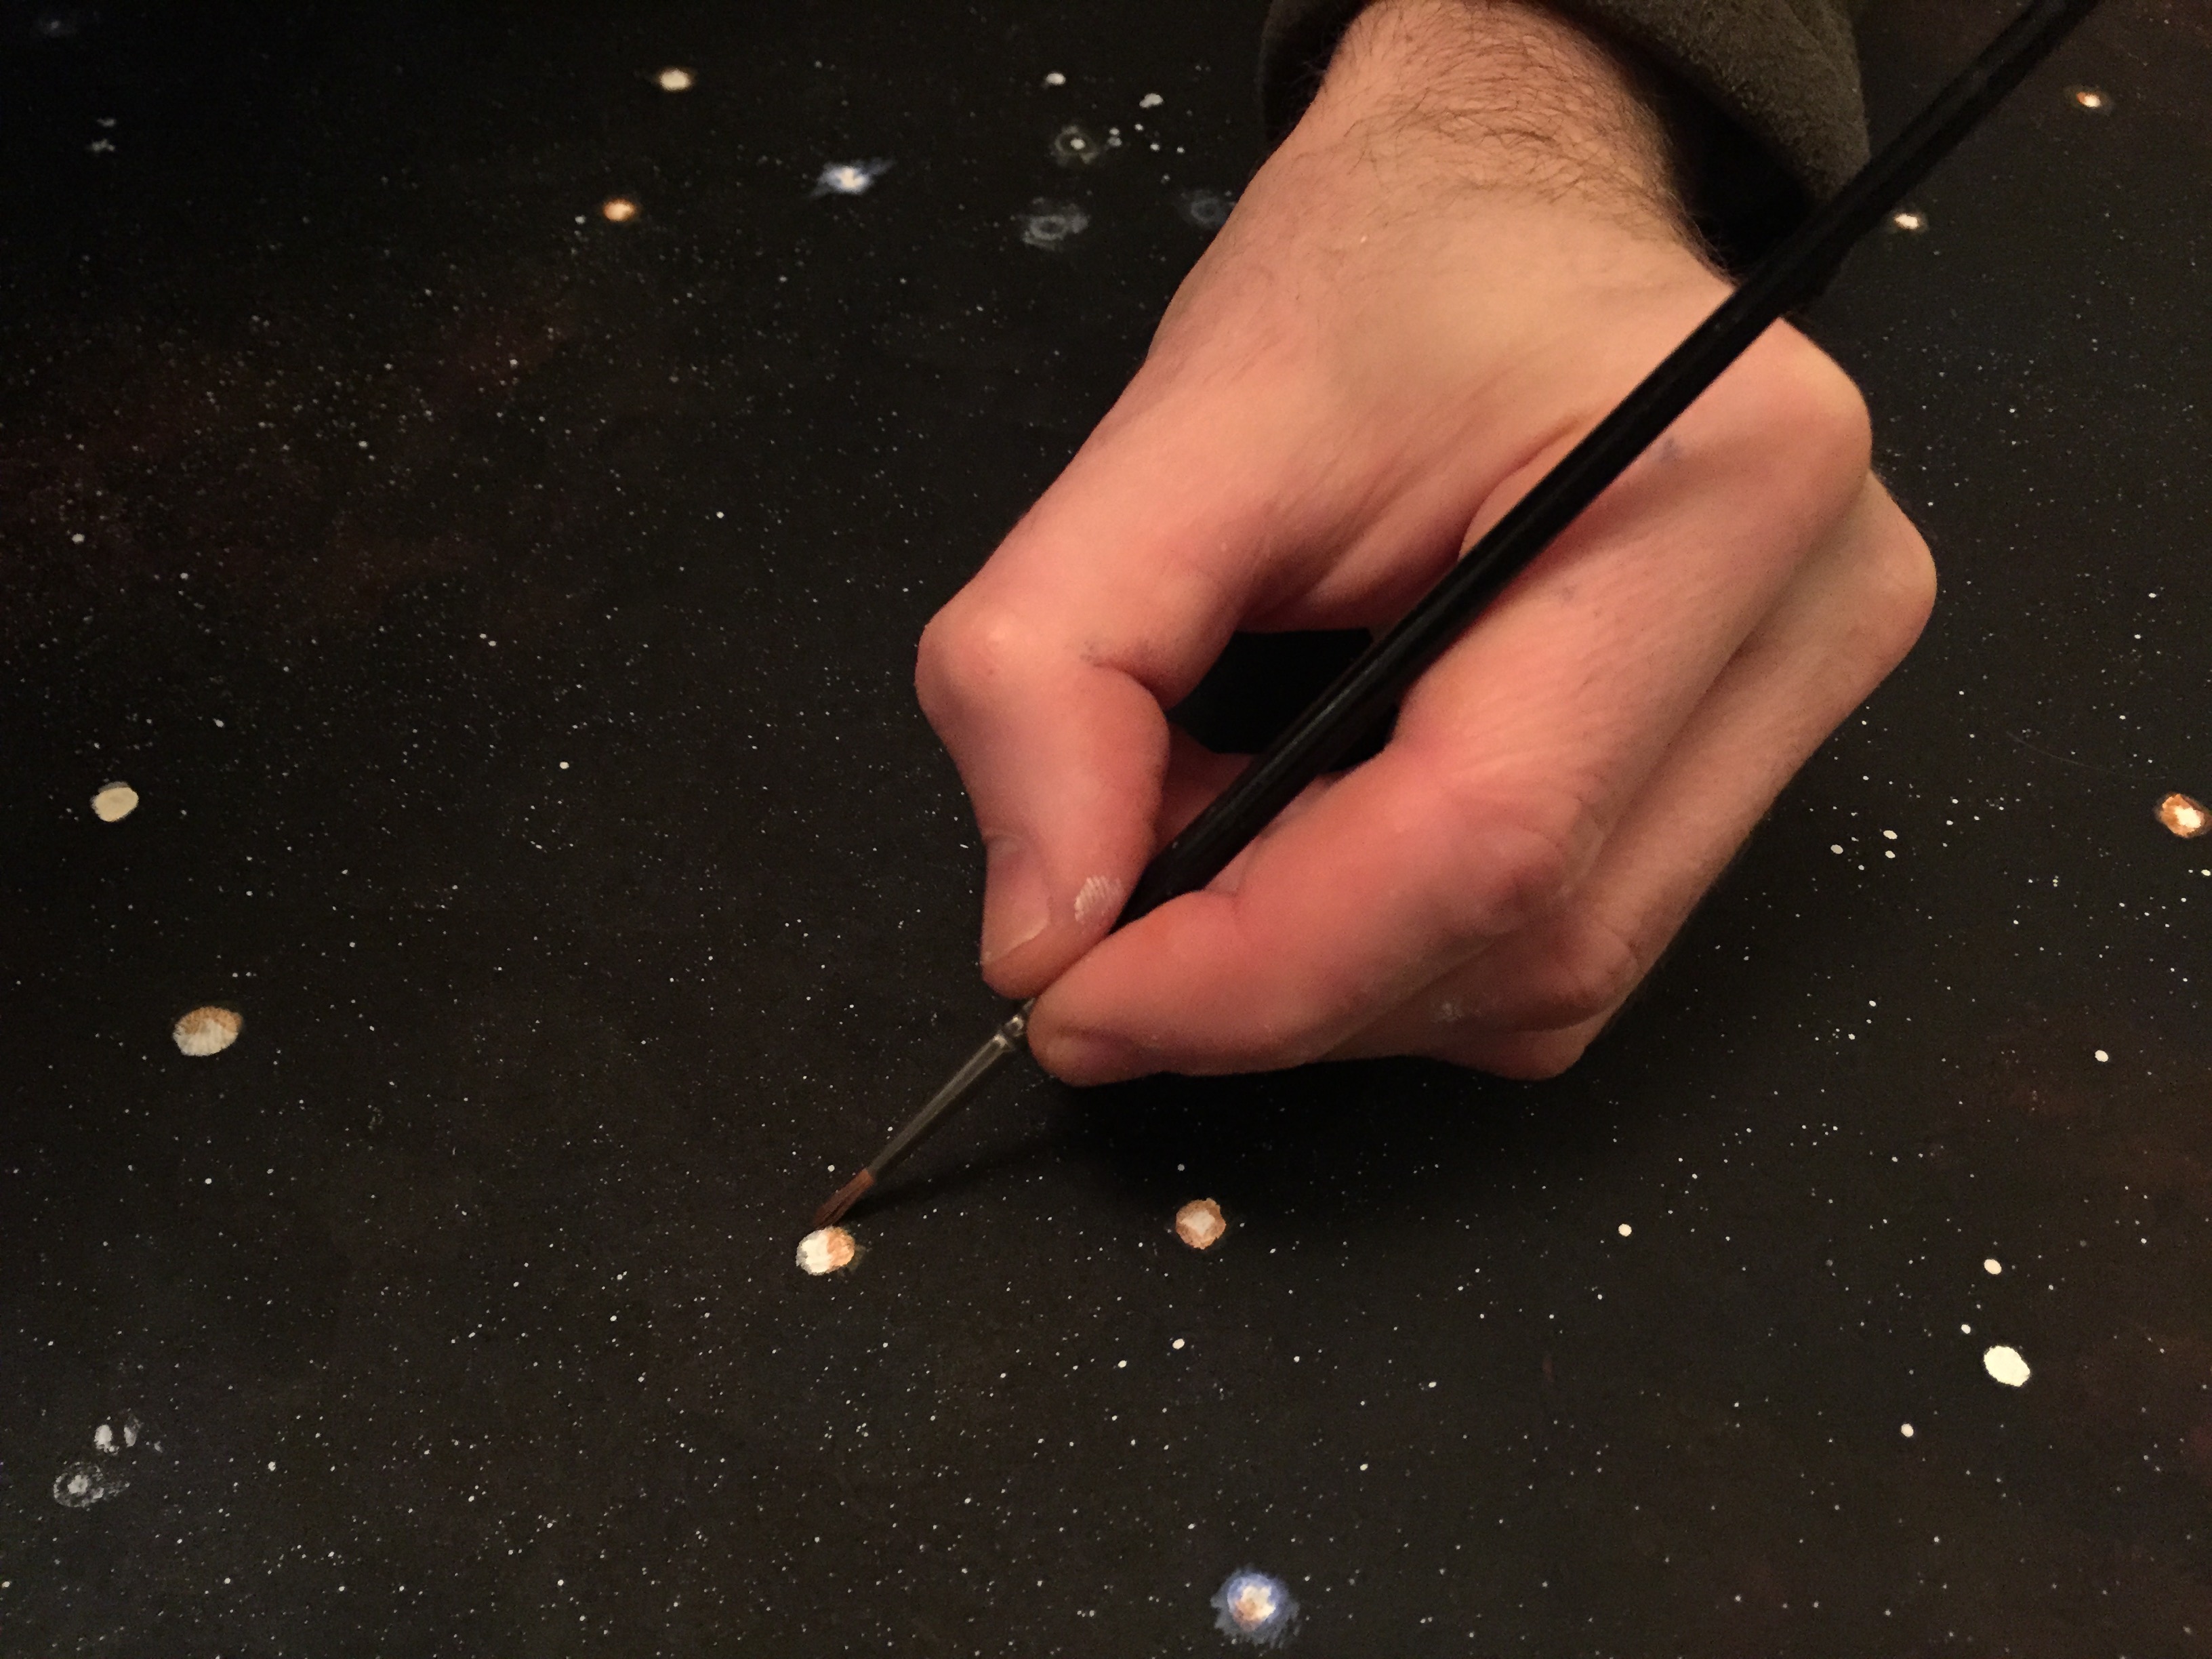
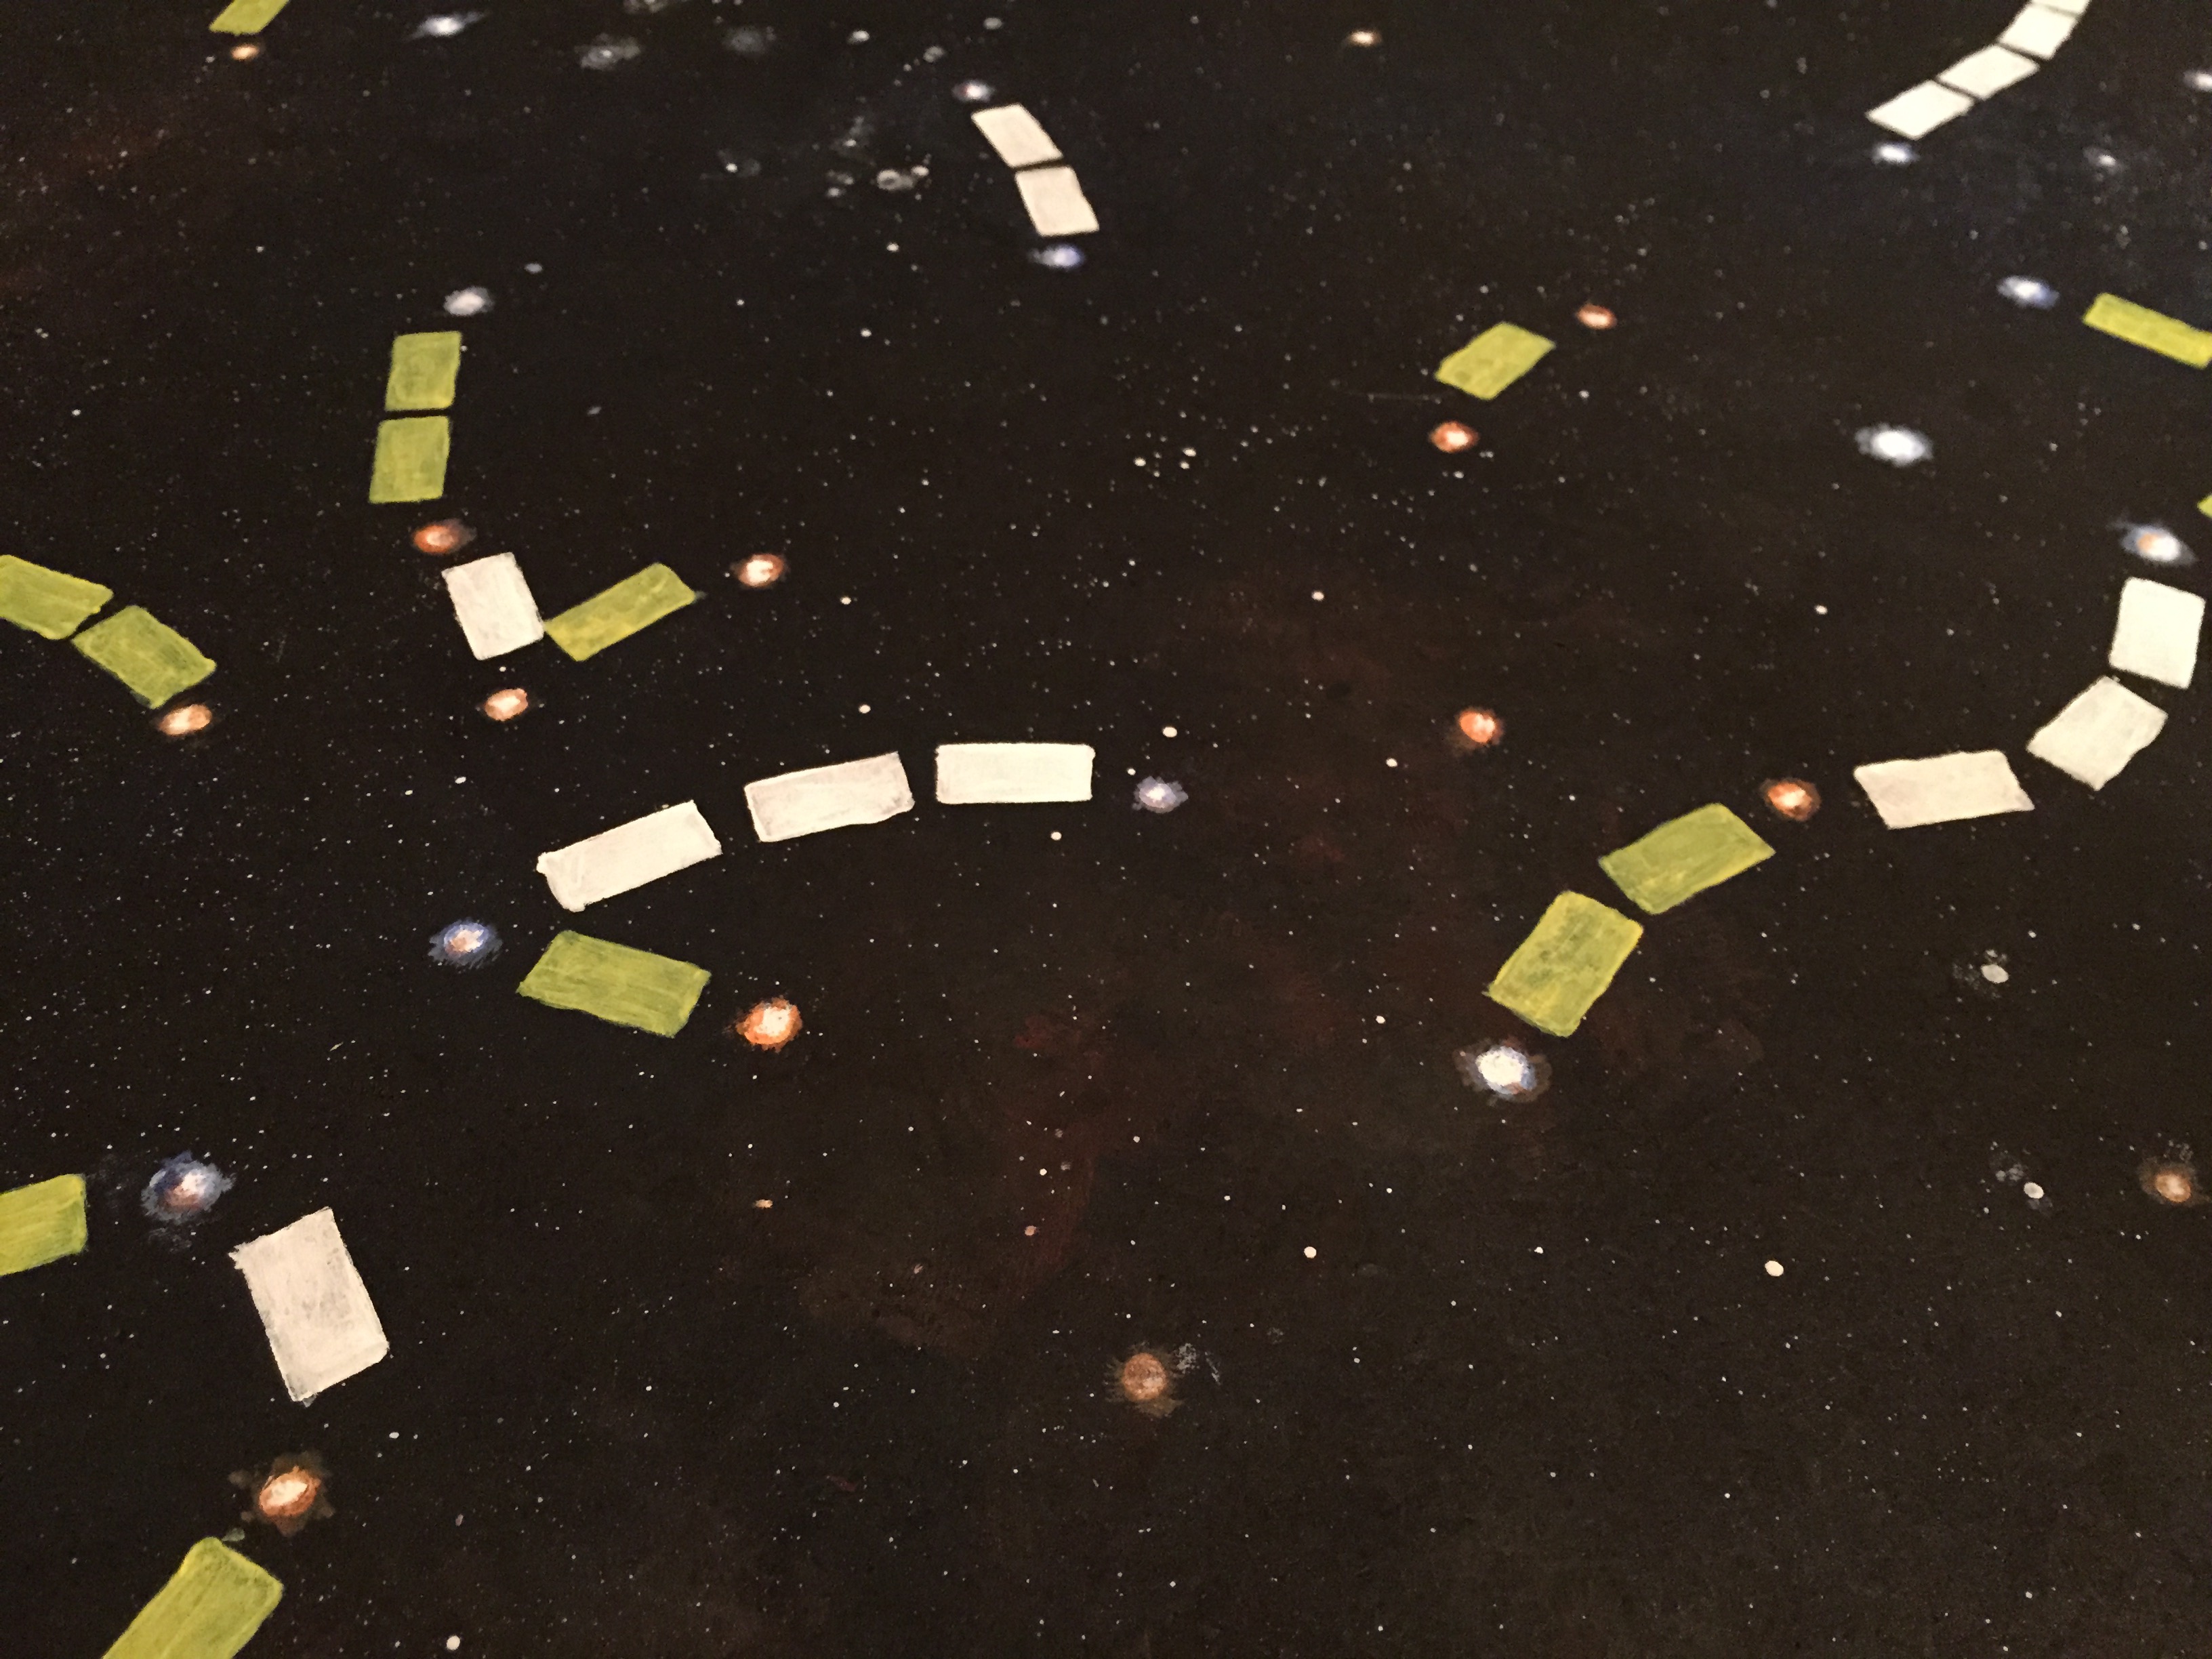
Then, using thick (undiluted) white acrylic and an old toothbrush, flick speckles of white across the board to create star fields. The trick is to use a very dry brush (very little paint), and try to avoid being too directional, but build up the field over several passes from different angles.
Next, create much bigger stars where your route nodes are (the cities from the Ticket to Ride universe), plus a few more medium stars around the map, where the galaxies look like they need some attention. Use white acrylic to make the stars, then use blue, orange or purple to create fringes around them that match the galaxy colours.
Now it’s time to create your routes. Paint rectangular blocks of colour between each node, sticking to the route lengths on the original map. Be sure to use colours that are distinct, and correspond to the colours you will use later on to make the freighter cards.
I used a cross hatched design to represent the wild card routes, that can be claimed with a set of cards of any colour.
Painting on the routes
When you’re happy with how it looks, give the whole board a coat of matt varnish.
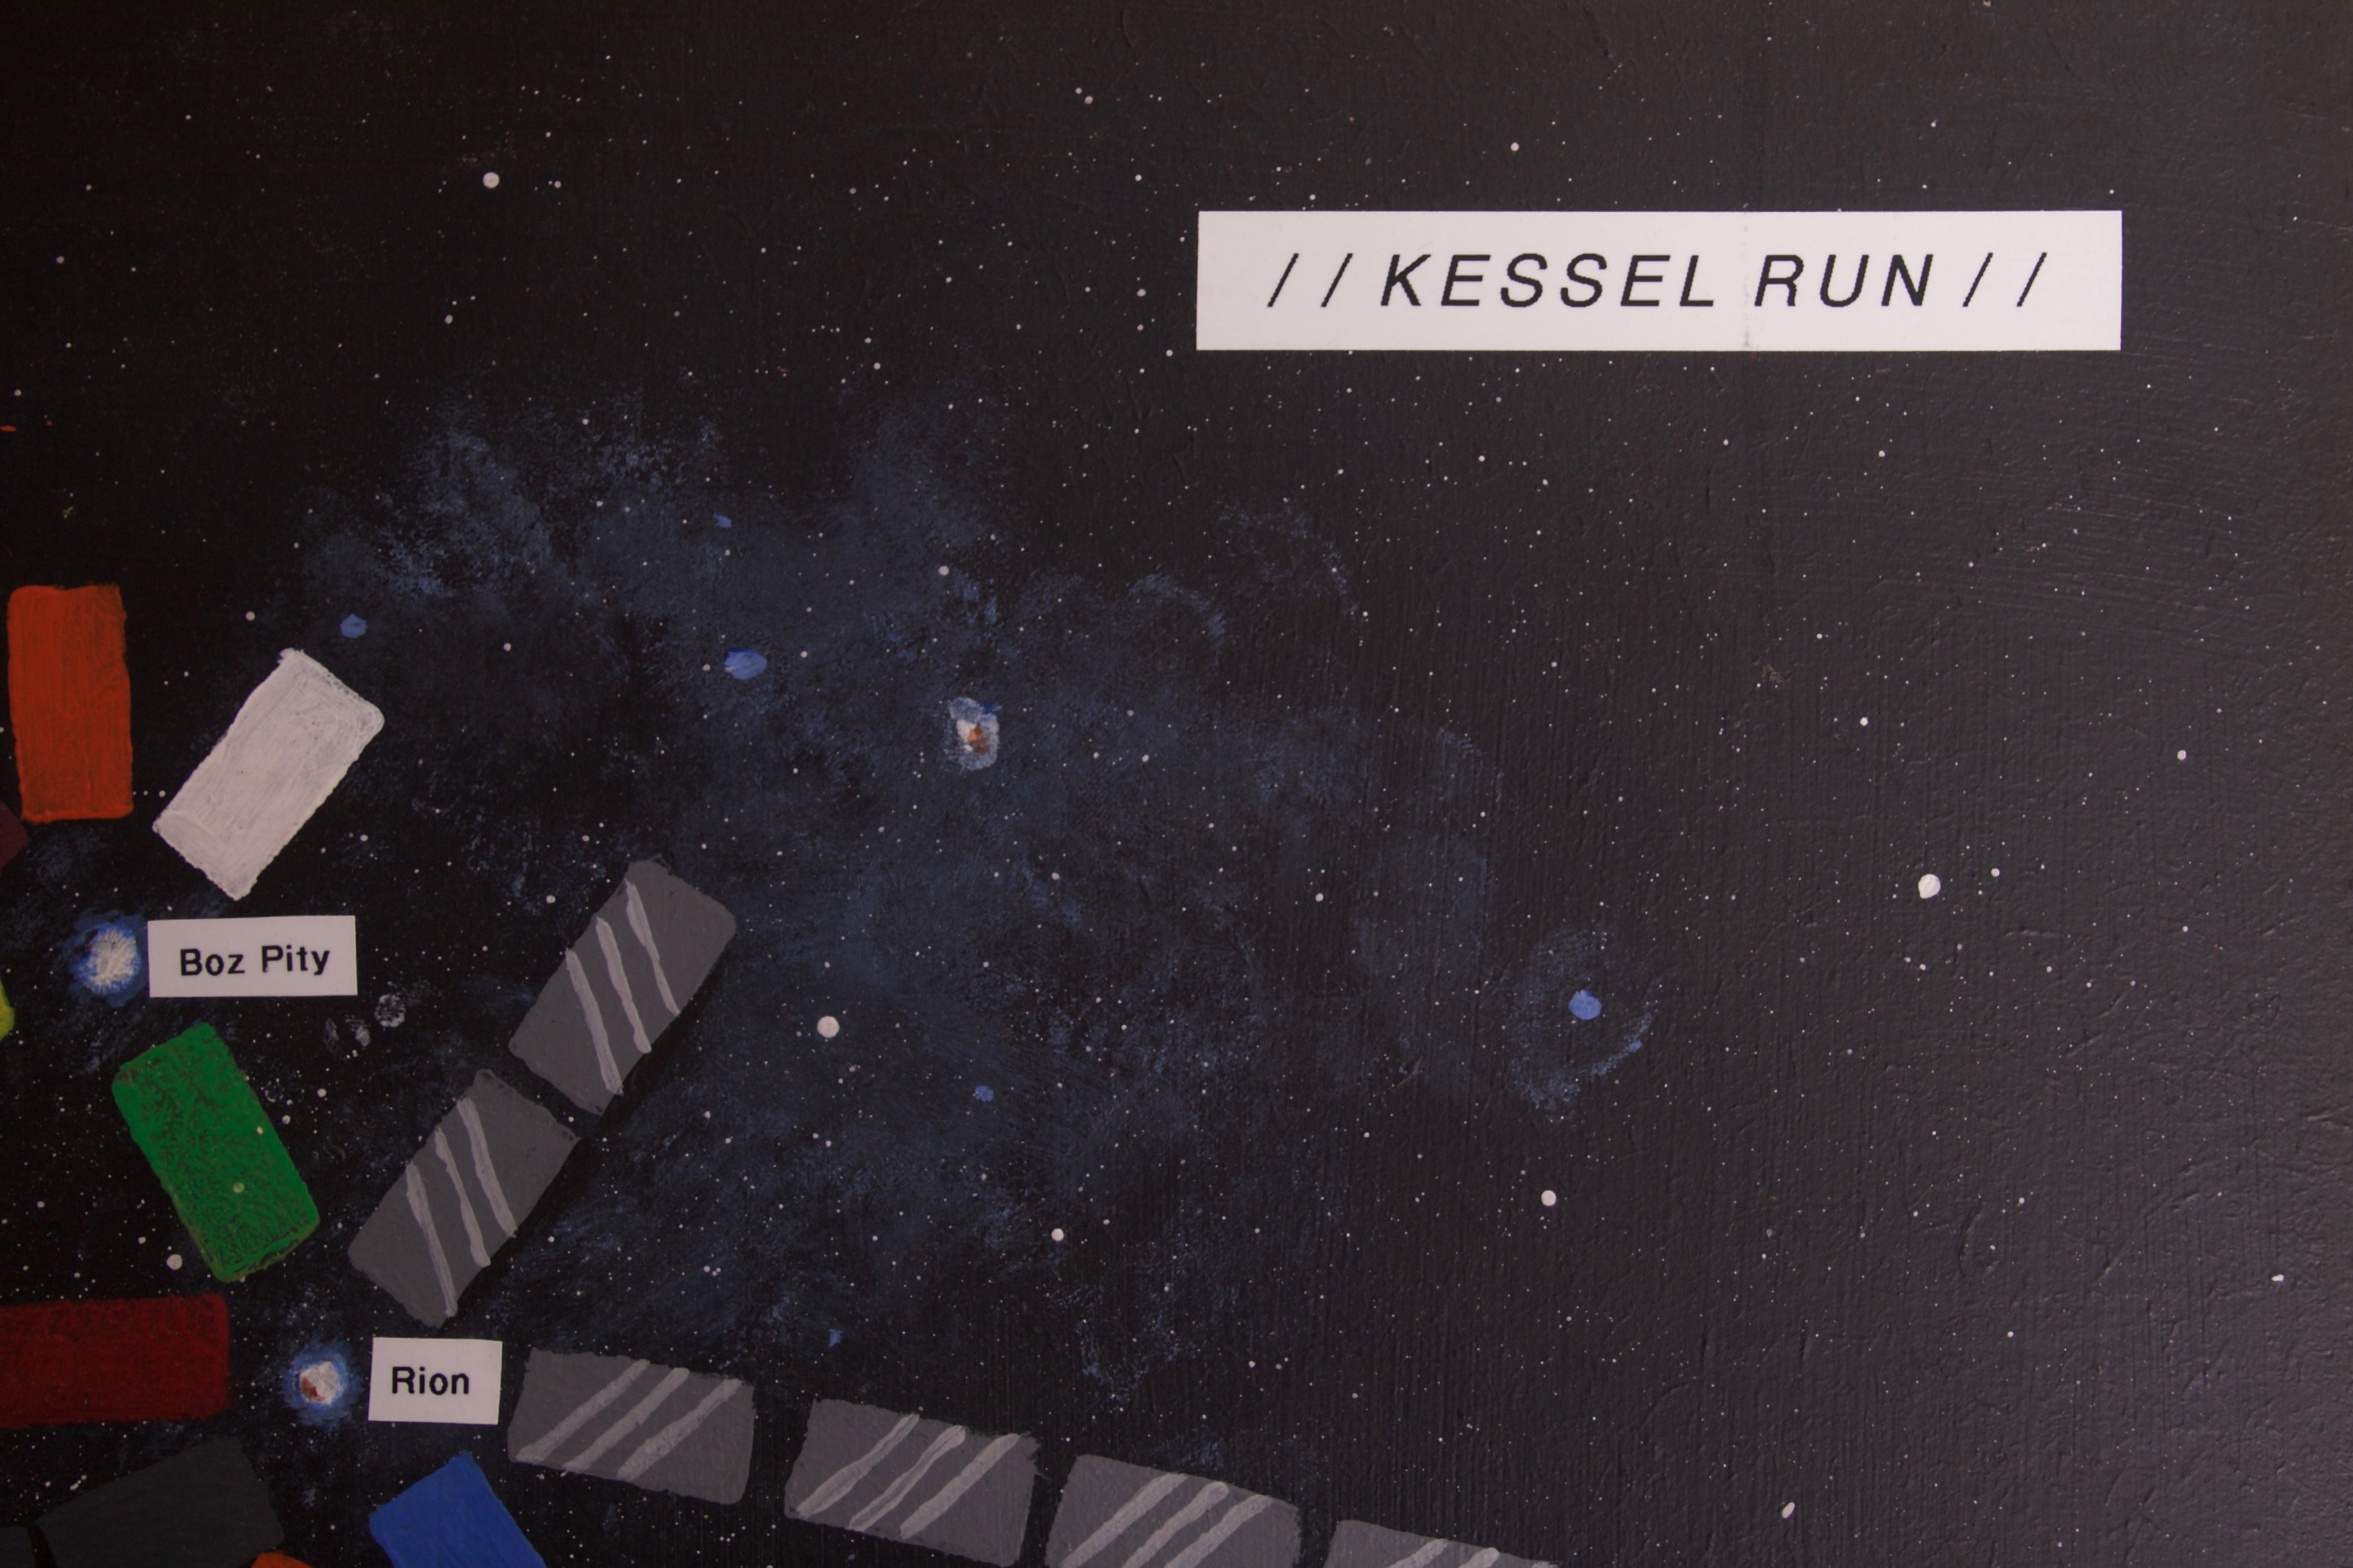
Now, decide what planets or systems you want to use from the Star Wars universe, and where you want to put them, and put your labels down.

Testing where the labels could go.
The Star Wars Wikia (Wookiepedia) lets you search for categories that interest you, for example, all the planets that also intersect with the ‘canon’ films, thereby leaving out the dross that only kids care about.
I was pretty casual at this stage. I looked up a list of all the places in Star Wars, picked all the ones I recognised from the proper films, and placed them pretty much wherever I liked, generally leaving those with more letters in the name to have more space around them. You could of course get very nerdy at this stage and do it properly…
Making the route cards
I have the Ticket to Ride iPad app. If you copy this app onto your computer, you can open the asset files inside the app package, and find all the artwork. The app has artwork for all the expansions, so locate the folder for the map you’re using and find all the .png files for each route card.
Translate from one universe to another
At this stage you should have two corresponding maps, one set in the Ticket to Ride universe, one (on the board you just made) set in the Star Wars universe. For each city on the TTR map, make a note of the corresponding place on your new map.
Now, make a text file containing all the routes on the Ticket to Ride route card, and the points for each route. It should look something like this:
basel-brio:10
 basel-stgallen:10
 basel-zurich:8
 bern-chur:10
 bern-france:12
 ...
Create a new text file and replace all the Ticket to Ride names with their corresponding Star Wars names. It should look a bit like this:
Dandoran-Kashyyyk:10
 Dandoran-Rion:10
 Dandoran-Ando:8
 Trogan-Geonosis:10
 Trogan-Anteevy:12
 ...
Copy this text, and paste it into an illustration programme. Make a series of card templates with dots for each node, and chop up the text file to create labels for each destination, and place all these next to the corresponding dot on the map, and draw a line between them.
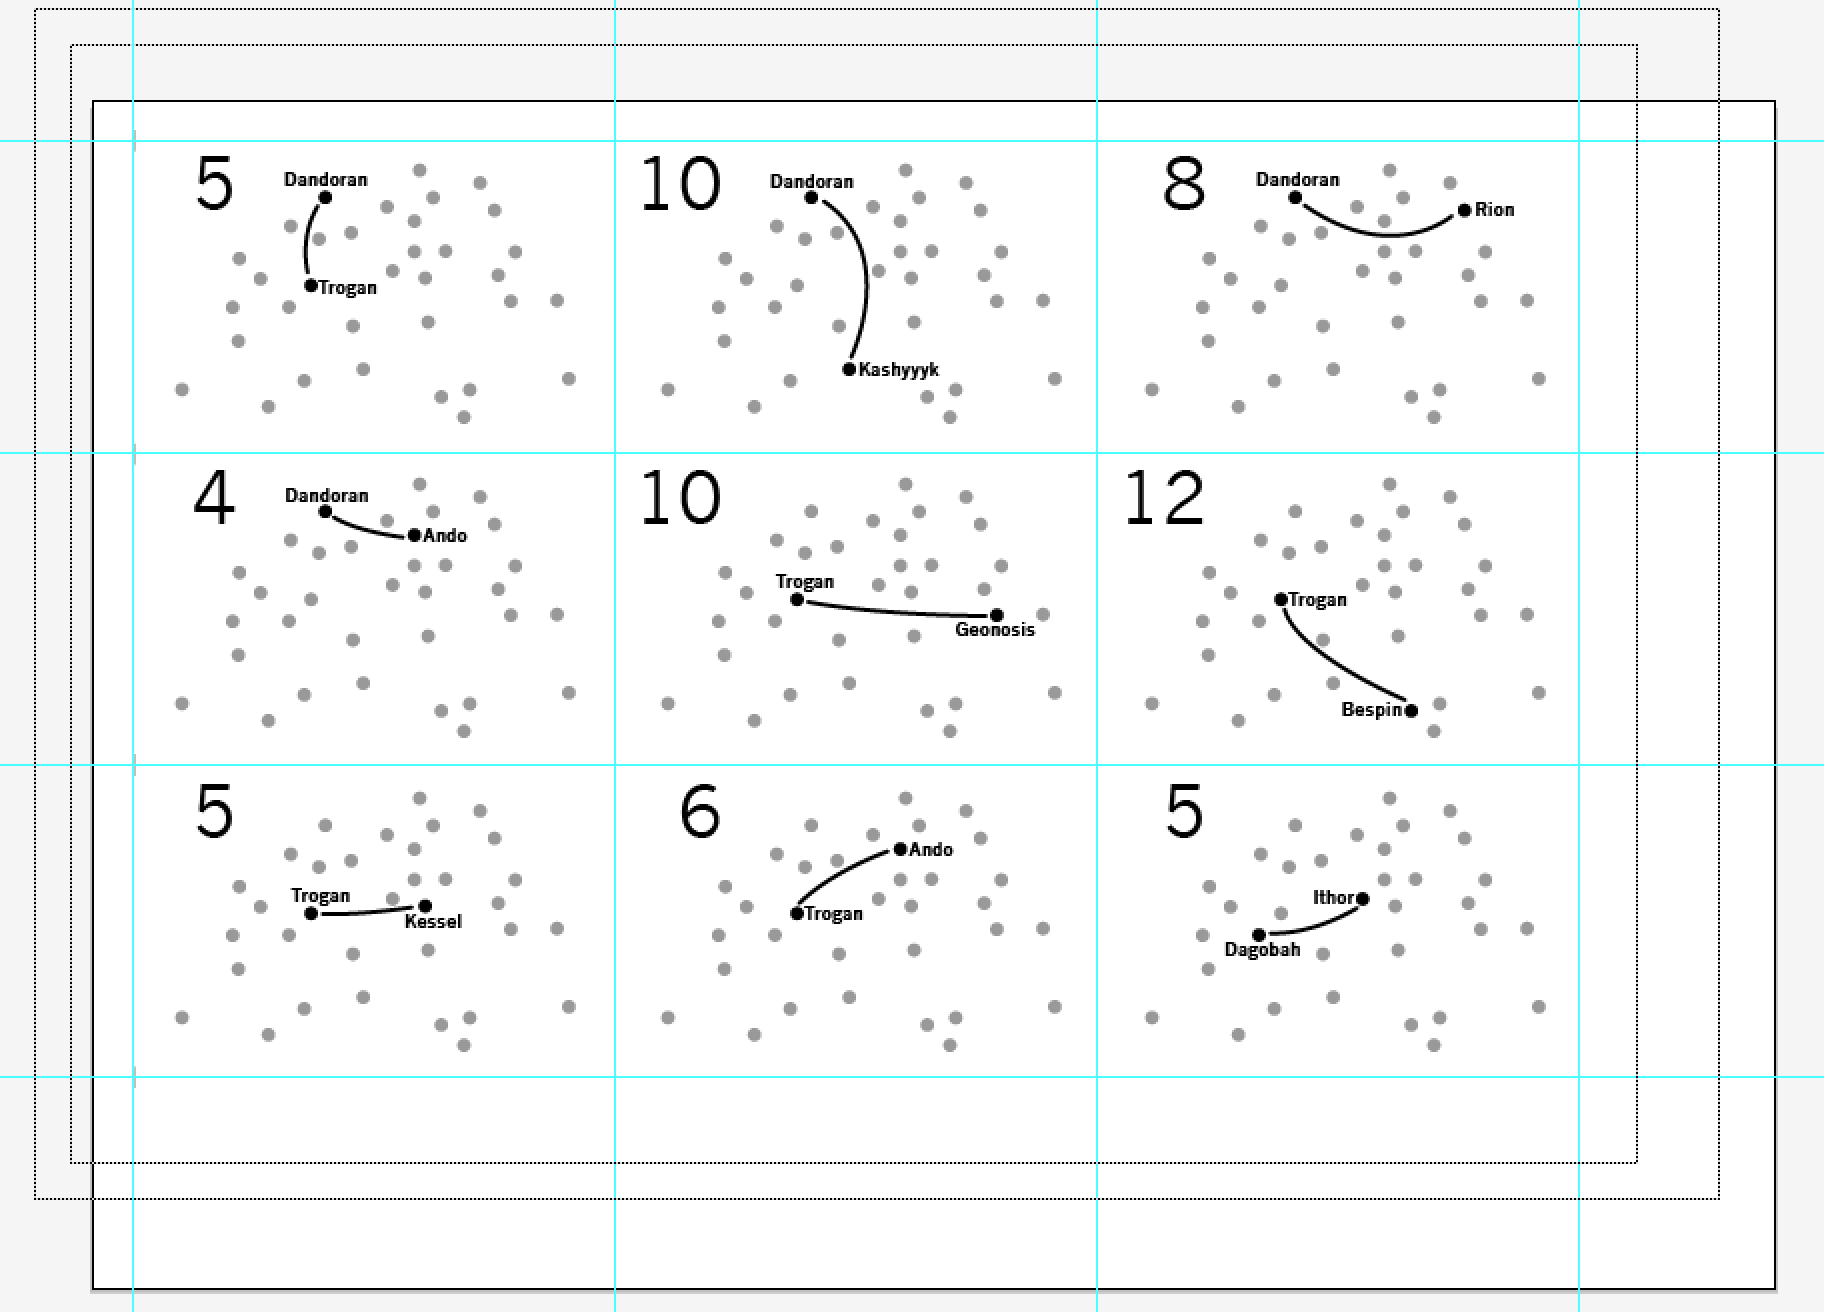
A screenshot of my Illustrator file with templates for all the route cards
A functionally similar approach would be to just create a series of sheets with the start and end point of each route, together with the score for that route, without any location cues. However, this shifts the burden of figuring out where each place is to the players of the game – which is not much fun. A core tactic in Ticket To Ride is to choose routes which cover the same territory, so it’s important to be able to quickly understand where routes are in relation to each other.
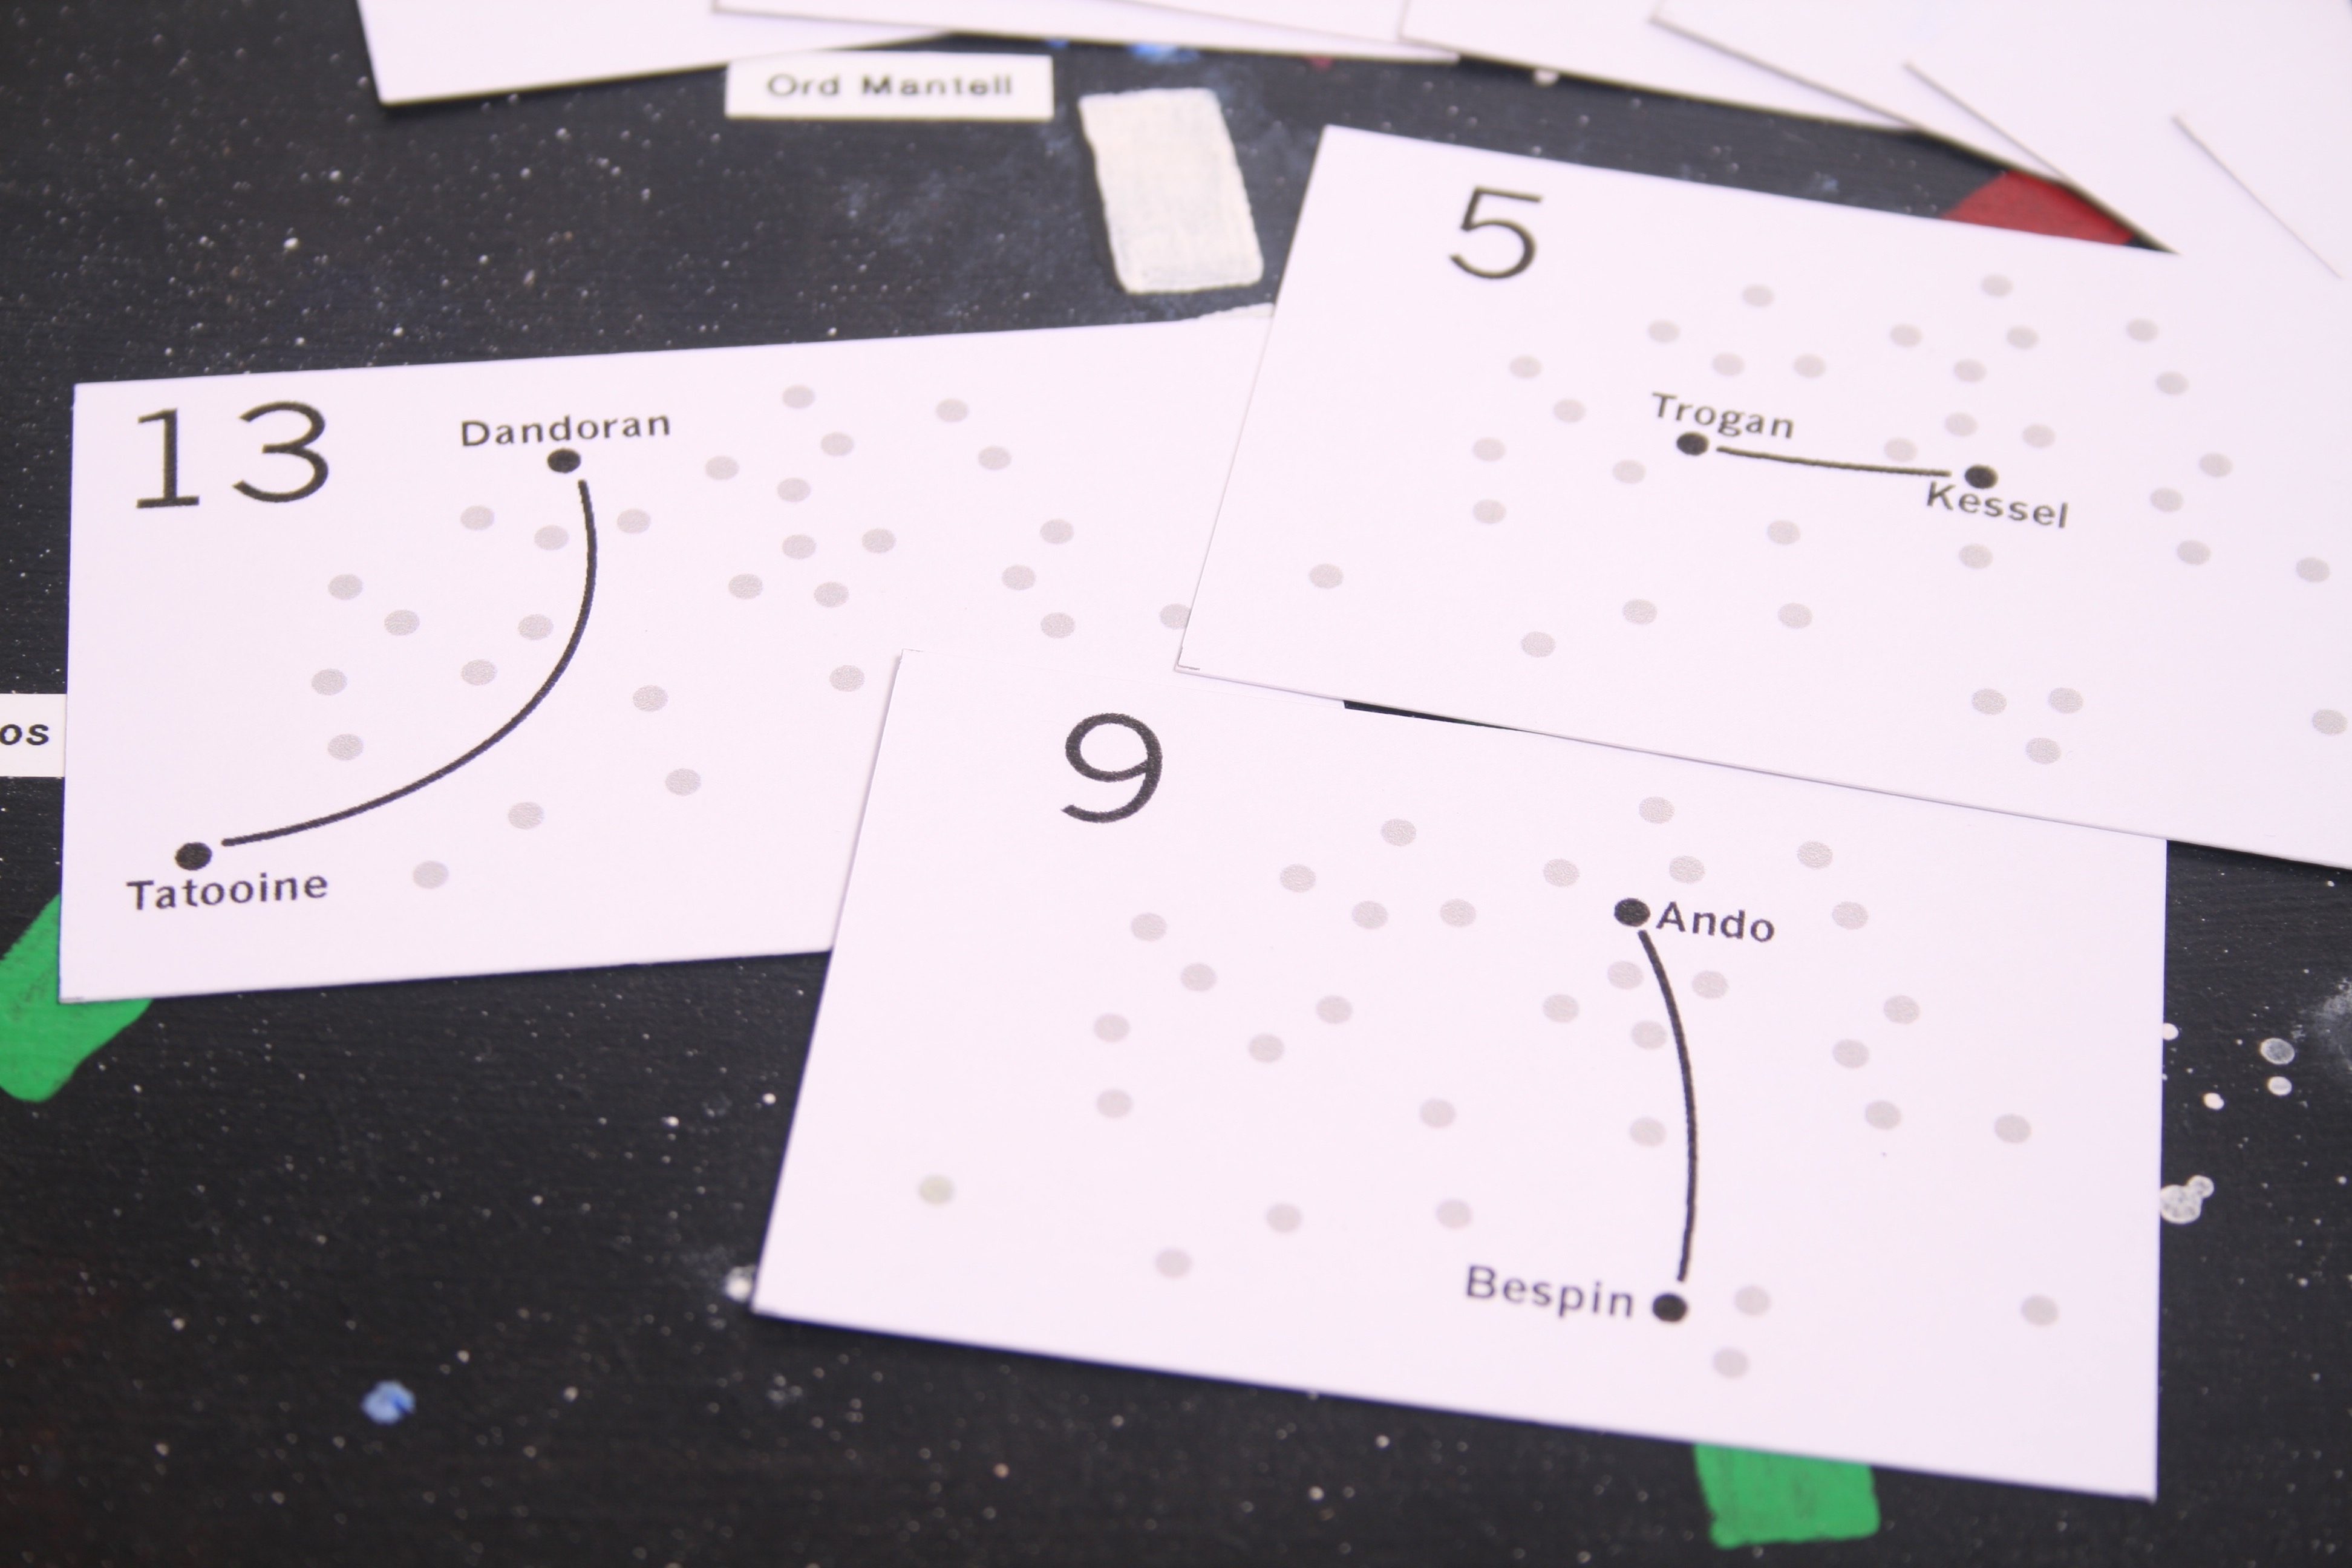
Printed route cards
Making the freighter cards
The main playing cards of Ticket to Ride are essentially just coloured cards. I created a very simple template in Illustrator with a big circle in the middle, and a smaller circle in the corner, to enable players to easily see the colour of cards in their hands when fanned out. As I don’t have access to a good colour printer, I just used coloured pencils to fill in each of the circles, and made an equal distribution of each colour. I used a multi-colour pencil to make the wild cards.
Clearly, you could make much better cards with some Star Wars artwork and a good printer.
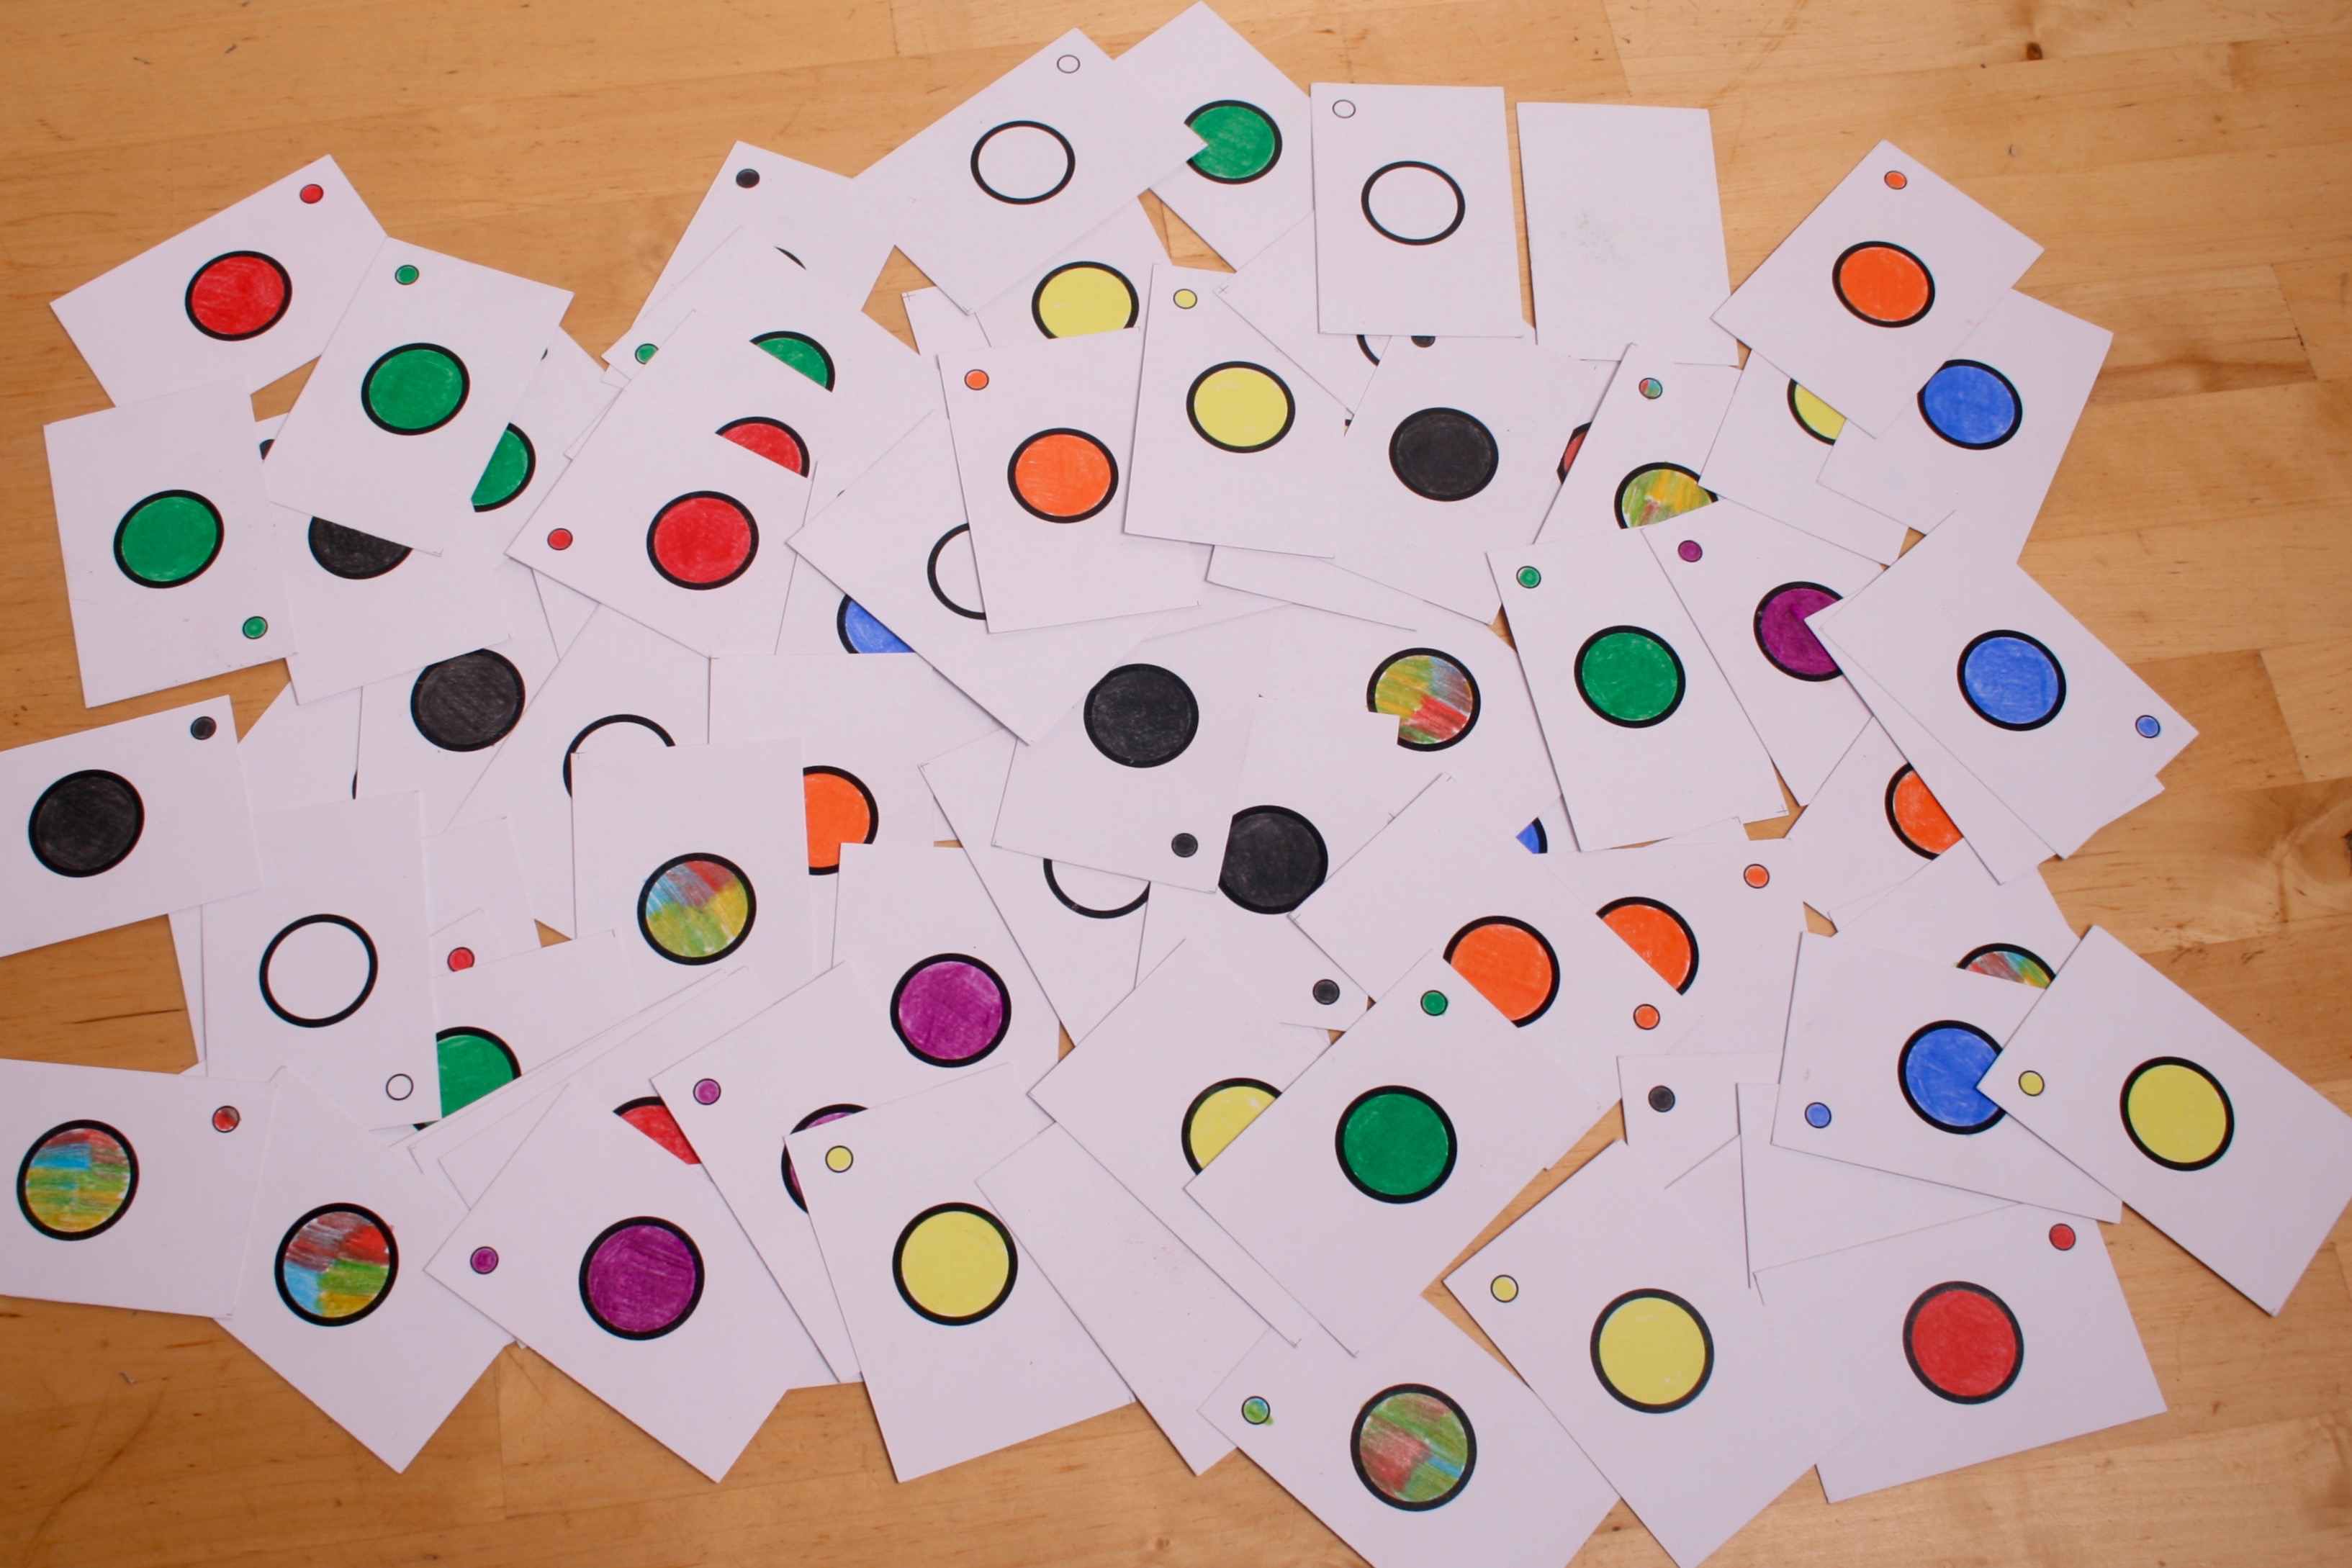
A simple design for coloured ‘freighter’ cards
Making the freighters
There are countless ways to do this. I created thing strips of wood, painted them in 4 different colours and then chopped them into lengths to fit on the routes. I made 50 of each.
If you have access to decent machine tools or moulds you could do also a way better job of this.
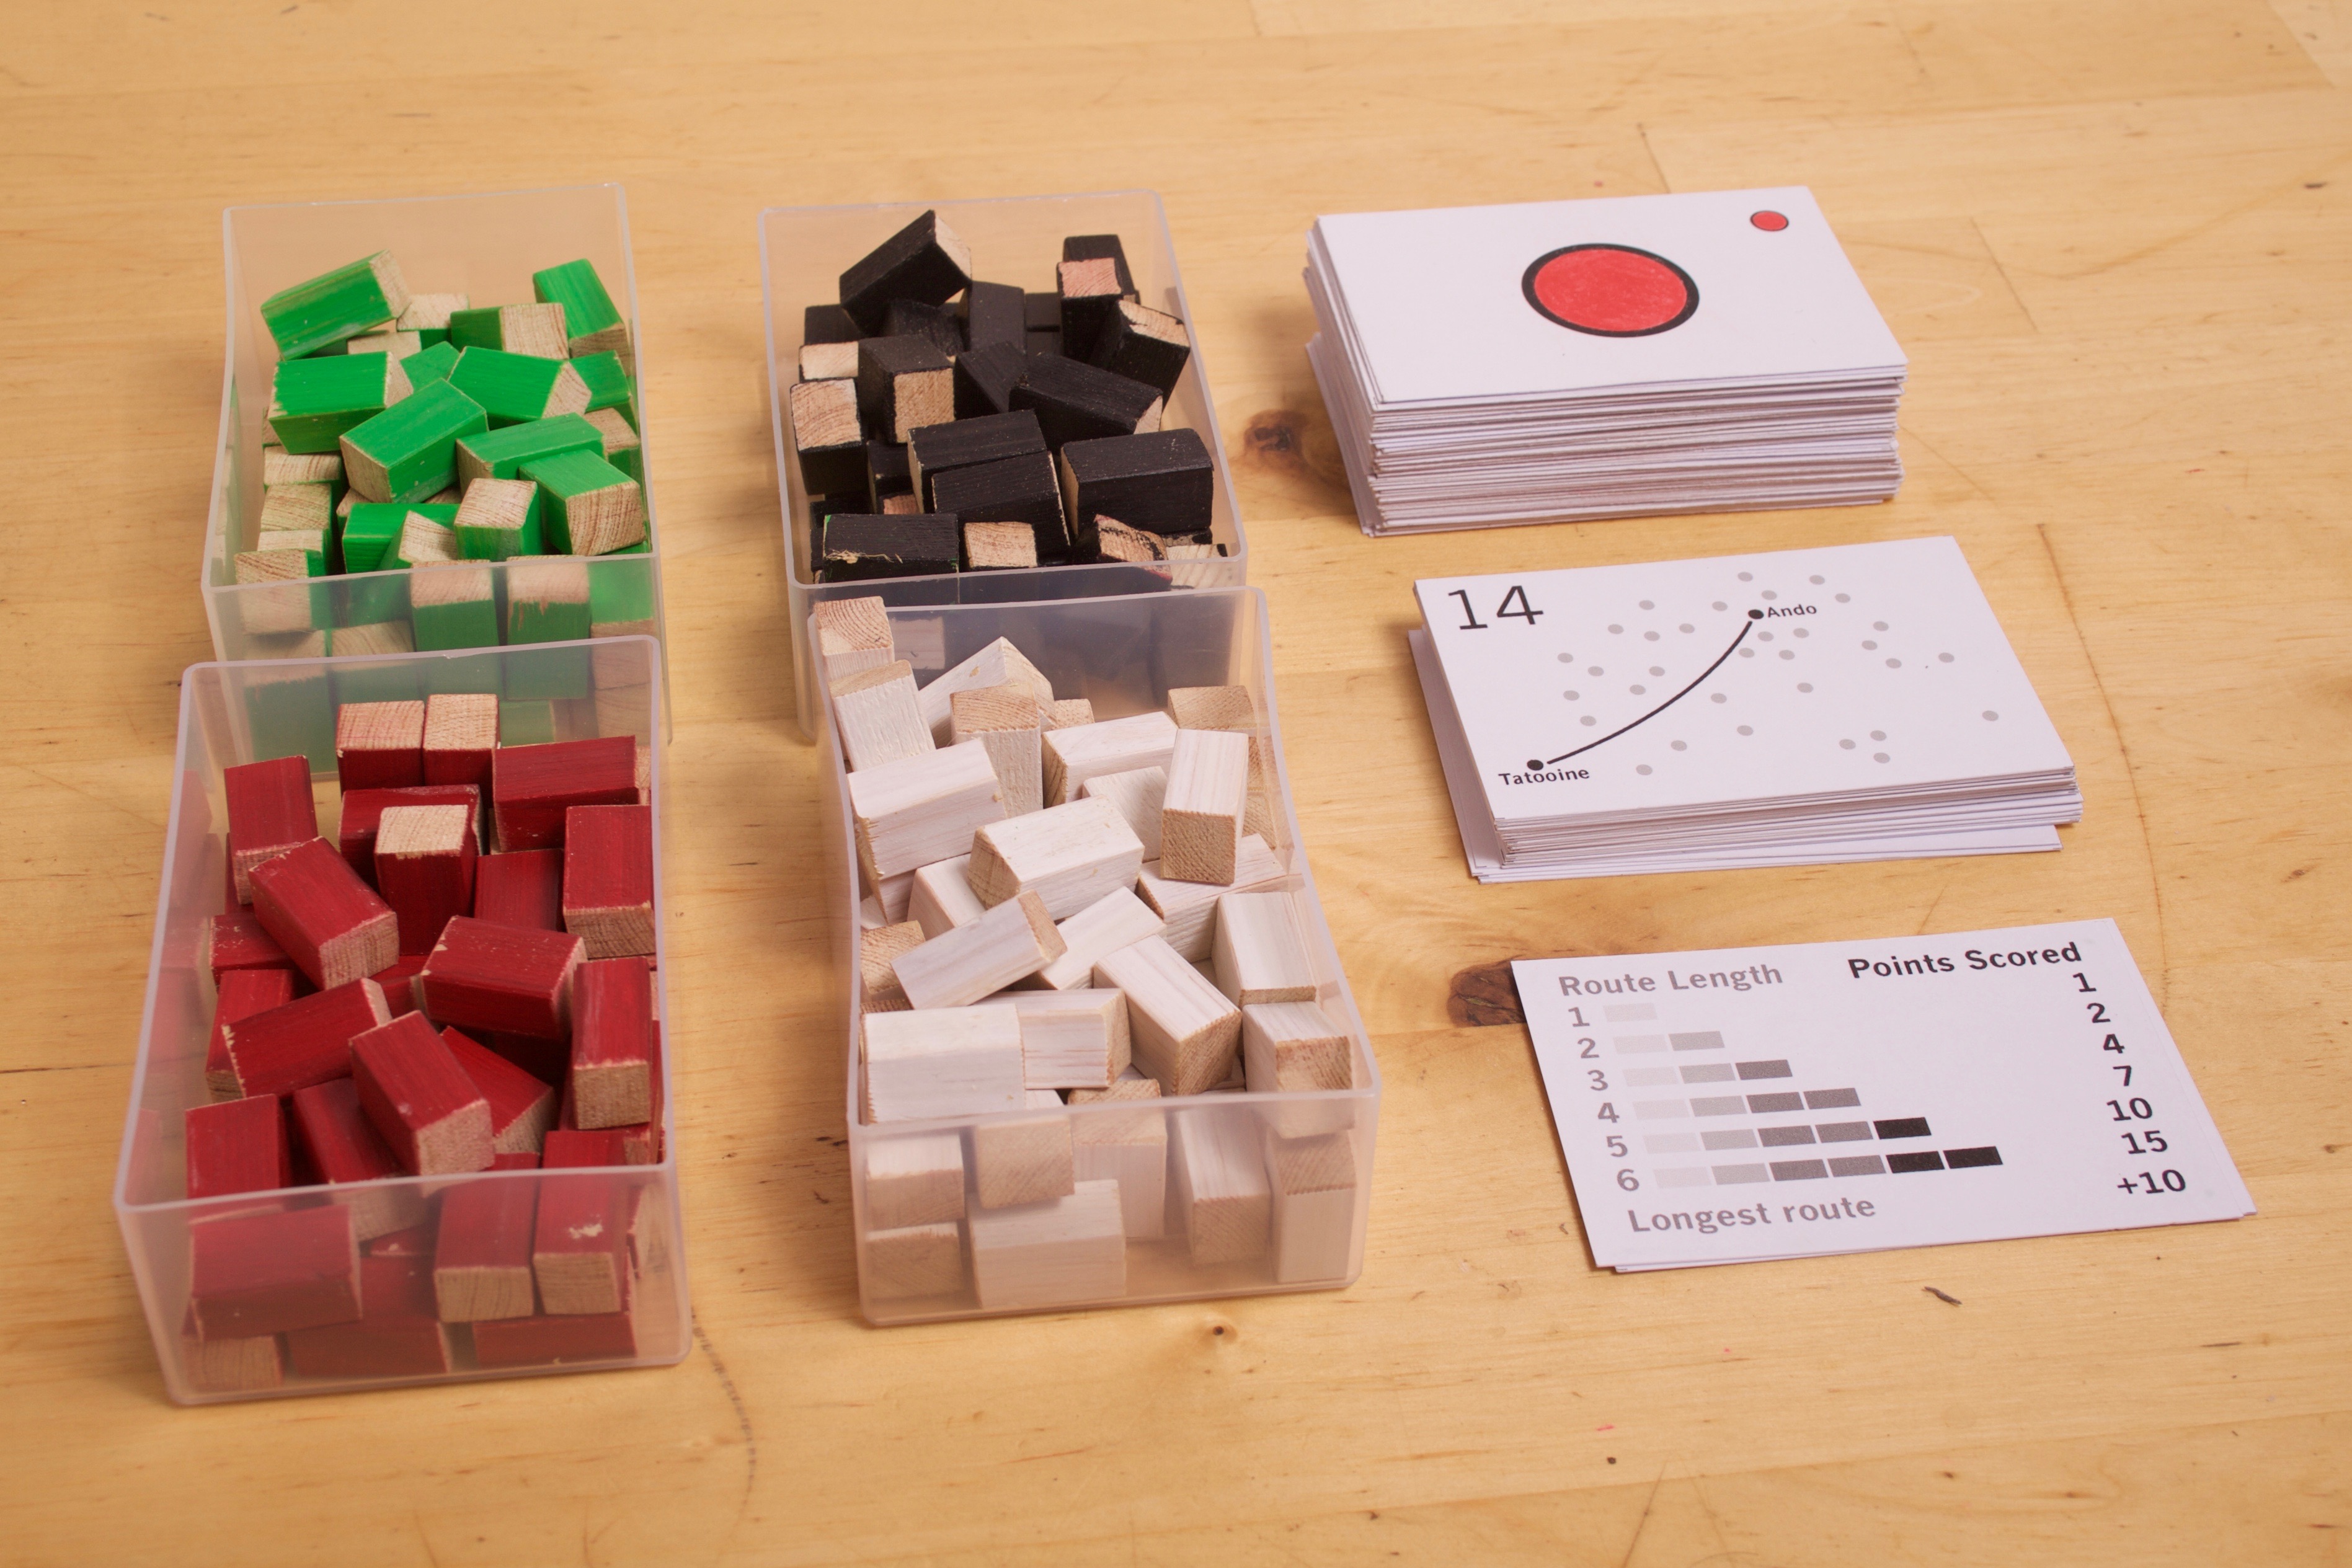
Freighters, freighter cards, route cards, and a couple of scoring reference cards
Play testing
We’ve had a lot of fun with this game, and I much prefer it to regular Ticket To Ride. I would probably stick with a more standard Ticket To Ride map and think more carefully about the placement of favourite places – in this version, you very rarely get to go to Endor, for example, which seems a pity.

A completed route
It’s worth being careful about the size of pieces; you need to be generous in the space you make for each piece to occupy.
I would also like to figure out a way to make a foldable board. This one is difficult to store.
I’d love to see others’ versions of this idea. Please share yours. A full set of images with more details on some steps is on Flickr.
May the force by with you.